

Are you tired of a dull home? 🏠 Imagine a stunning, functional space overnight! At My Home Twitza, a standout in Hyderabad real estate, transformations happen fast. Located in HITEC City, its 2 BHK and 3 BHK apartments offer spacious layouts for bold kitchen designs, DIY art, and smart storage. Add color, safety tech, or seasonal decor to revitalize your space. With amenities like a gym and clubhouse, My Home Twitza is perfect for creative upgrades. Explore 10 jaw-dropping tips in our blog and . Transform your home today!
Table of Contents
Transform Your Kitchen with Bold Design Choices
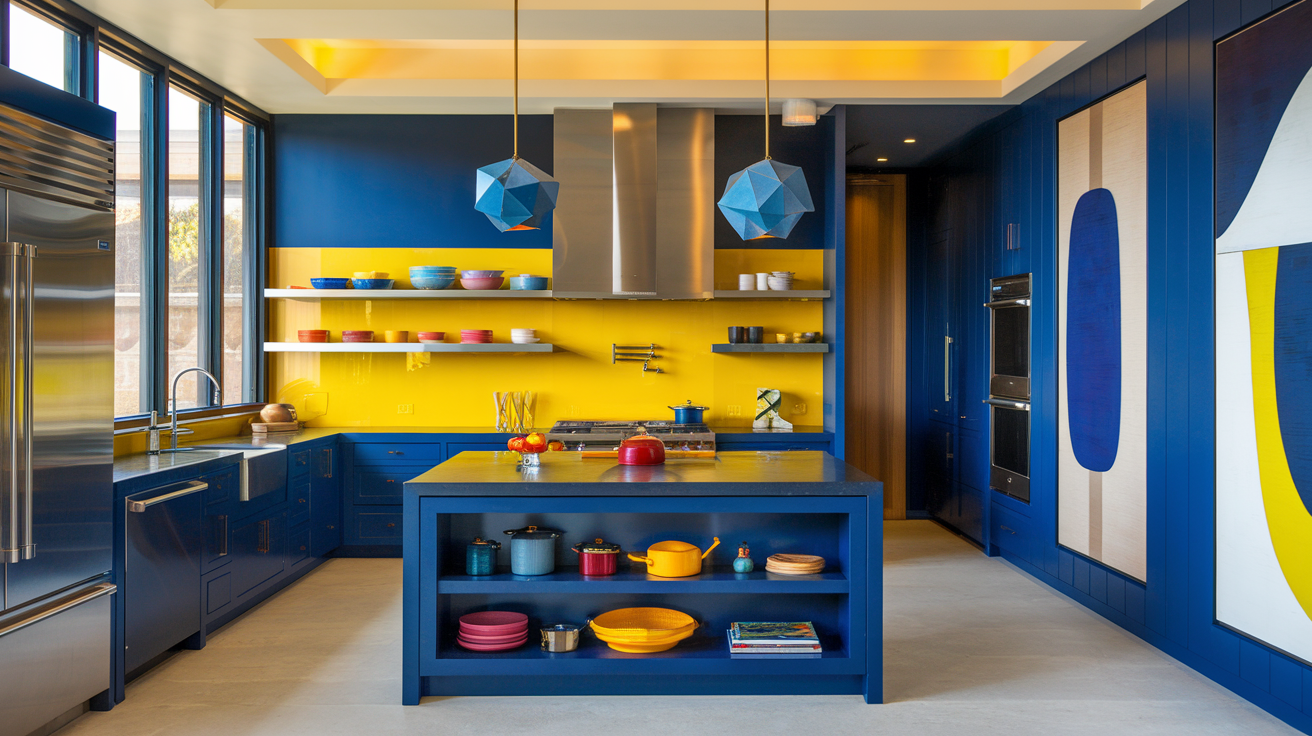
A. Install navy blue cabinets for a striking focal point
Navy blue cabinets have become a popular choice for homeowners looking to transform their kitchens with bold design choices. This deep, rich color creates a striking focal point that can elevate the entire space. When implemented correctly, navy blue cabinets can add sophistication, depth, and visual interest to your kitchen.
One of the most effective ways to incorporate navy blue cabinets is by pairing them with contrasting elements. White marble countertops, for instance, create a stunning contrast against the dark cabinets, brightening the space while adding a touch of luxury. This combination of cool tones creates a classic and timeless look that can suit various kitchen styles.
To further enhance the visual impact of navy blue cabinets, consider incorporating brass hardware. The warmth of brass against the cool tones of navy and white creates a balanced and sophisticated atmosphere. Here’s a breakdown of how you can combine these elements:
| Element | Color/Material | Purpose |
|---|---|---|
| Cabinets | Navy Blue | Focal point, depth |
| Countertops | White Marble | Contrast, brightness |
| Hardware | Brass | Warmth, sophistication |
For those who want to make an even bolder statement, a navy blue kitchen island can serve as a centerpiece. This approach works particularly well when paired with light-colored perimeter cabinets, creating a dynamic visual contrast. The island becomes a natural gathering point and conversation starter, while the lighter cabinets maintain an open and airy feel in the rest of the kitchen.
Lighting plays a crucial role in showcasing navy blue cabinets. Brass pendant lights not only complement the cabinet hardware but also add warmth and create a sophisticated atmosphere. The interplay of light and shadow on the deep blue surface can create interesting visual effects throughout the day, adding depth and dimension to your kitchen.
To balance the solid appearance of navy cabinets, consider incorporating glass-front cabinets. This mix of solid and transparent elements allows you to display favorite dishware or decorative items against the striking navy backdrop. It also helps to break up large expanses of color, preventing the space from feeling too heavy or overwhelming.
When it comes to backsplashes, a classic subway tile can provide the perfect canvas for navy cabinets to shine. The choice of grout color can subtly influence the overall look:
- Light grout: Creates a crisp, clean appearance
- Dark grout: Adds depth and accentuates the tile pattern
- Matching grout: Provides a seamless, sophisticated look
For those hesitant to commit to full navy cabinetry, painting only the lower cabinets navy is an excellent compromise. This two-tone approach creates visual interest while maintaining a lighter feel in the upper portion of the kitchen. It’s an effective way to incorporate the bold color without overwhelming the space.
To add a modern flair, consider using hexagonal tiles in your kitchen design. These geometric shapes can create an interesting backdrop for navy cabinets, adding texture and visual interest to the space. The contrast between the angular tiles and the smooth cabinet surfaces can create a dynamic and contemporary look.
Integrating warmth is essential when working with cool tones like navy. Wooden flooring can provide a natural, warm counterpoint to the deep blue cabinets. The rich tones of wood complement the navy beautifully, creating a harmonious balance in the kitchen. Additionally, choosing neutral wall tones can help to soften the overall look and prevent the space from feeling too dark or enclosed.
For those who appreciate timeless design, Shaker-style cabinets in navy blue offer a perfect blend of classic and contemporary. The simple, clean lines of Shaker cabinets allow the rich color to take center stage without overwhelming the space. To add an extra layer of distinction, consider incorporating copper accents. The warm, reddish tones of copper create a beautiful contrast against the cool navy, adding depth and character to the kitchen.
Lighting is crucial in showcasing the beauty of navy cabinets. Under-cabinet lighting not only enhances functionality but also accentuates the color contrast between the cabinets and countertops. This strategic lighting can create a warm glow that highlights the depth of the navy color while ensuring that work areas are well-lit.
For a subtle yet impactful addition, consider painting your pantry door navy blue. This unexpected pop of color can tie the kitchen design together, especially in spaces where full navy cabinetry might be too overwhelming. It’s a small change that can make a significant impact on the overall aesthetic of your kitchen.
Lastly, don’t be afraid to incorporate patterned tiles into your navy kitchen design. Whether on the floor or as a backsplash, patterned tiles can add personality and visual texture to the space. The key is to choose patterns that complement rather than compete with the bold navy cabinets. Here are some pattern ideas that work well with navy:
- Geometric patterns in white and gray
- Moroccan-inspired designs in blue and white
- Subtle floral patterns in neutral tones
- Art deco-inspired motifs in gold or brass
By carefully selecting complementary elements and thoughtfully incorporating navy blue cabinets, you can create a kitchen that is both striking and sophisticated. The bold choice of navy cabinetry serves as a foundation for a design that is timeless, yet distinctly modern and personal.
B. Add a faux brick backsplash for an eclectic coffee shop ambiance
Creating an eclectic coffee shop ambiance in your kitchen can transform the space into a cozy, inviting area that encourages lingering conversations and memorable moments. One of the most effective ways to achieve this atmosphere is by adding a faux brick backsplash. This design choice not only adds texture and visual interest but also brings a touch of industrial chic to your kitchen, reminiscent of trendy urban cafes.
Faux brick backsplashes offer several advantages over real brick:
- Easier installation
- Lighter weight
- More consistent appearance
- Lower cost
- Easier maintenance
When selecting a faux brick backsplash to complement your navy blue cabinets, consider the following color options:
| Brick Color | Effect |
|---|---|
| White | Creates a bright, airy contrast |
| Red | Adds warmth and a classic look |
| Gray | Offers a modern, industrial feel |
| Mixed tones | Provides depth and character |
The texture of the faux brick adds depth to the kitchen, creating an interesting interplay with the smooth surfaces of the navy cabinets. This contrast in textures enhances the overall visual appeal of the space, making it more dynamic and inviting.
To further enhance the coffee shop ambiance, consider incorporating these elements:
- Open shelving: Display coffee mugs, tea sets, or small plants
- Pendant lighting: Choose industrial-style fixtures for an authentic cafe feel
- Bar stools: Add seating at the kitchen island for a casual, cafe-like atmosphere
- Chalkboard accents: Use for menus, quotes, or daily specials
- Vintage-inspired accessories: Think old coffee grinders, scales, or signage
The combination of navy blue cabinets and a faux brick backsplash creates a perfect backdrop for these eclectic elements. The deep blue of the cabinets provides a sophisticated base, while the textured backsplash adds character and warmth.
To ensure that your faux brick backsplash complements the navy cabinets effectively, consider these design tips:
Choose a grout color that enhances the overall look. Light grout can make the bricks stand out more, while dark grout can create a more cohesive appearance.
Extend the backsplash to the ceiling in certain areas to create feature walls. This can be particularly effective behind open shelving or around a range hood.
Mix in some glass tiles or metallic accents within the brick pattern for added interest and to tie in with other elements in the kitchen.
Use different laying patterns to create visual interest. Herringbone or basketweave patterns can add a unique touch to your backsplash.
Consider using faux brick panels for easier installation and a more uniform look.
When selecting accessories to complement your navy cabinets and faux brick backsplash, opt for items that enhance the coffee shop theme:
- Copper or brass coffee makers and kettles
- Vintage-style coffee canisters and storage containers
- Artisanal ceramic mugs and plates
- Woven baskets for storing napkins or small items
- Plants in terracotta pots for a touch of greenery
The key to achieving an authentic coffee shop ambiance is in the details. Consider adding a small coffee station with a built-in espresso machine, grinder, and storage for various coffee beans. This not only enhances the theme but also adds functionality to your kitchen.
Lighting plays a crucial role in creating the right atmosphere. In addition to pendant lights, consider:
- Under-cabinet lighting to highlight the texture of the faux brick backsplash
- Warm-toned LED strips to create a cozy glow
- Adjustable task lighting for food preparation areas
To further enhance the eclectic feel, mix and match different seating options. Combine bar stools at the island with a small cafe table and chairs in a corner nook. This variety in seating arrangements encourages different uses of the space, from quick breakfasts to leisurely afternoon coffee breaks.
Don’t forget about the power of scent in creating an immersive coffee shop experience. Use coffee-scented candles or diffusers to infuse the air with the comforting aroma of freshly brewed coffee.
By carefully combining navy blue cabinets with a faux brick backsplash and thoughtfully selected accessories, you can create a kitchen that not only serves as a functional cooking space but also as a cozy retreat reminiscent of your favorite coffee shop. This unique blend of sophistication and warmth will make your kitchen a favorite gathering spot for family and friends alike.
C. Incorporate open shelving and a custom island for enhanced functionality
Incorporating open shelving and a custom island into your kitchen design not only enhances functionality but also adds a layer of style and personalization to the space. When combined with navy blue cabinets and a faux brick backsplash, these elements create a kitchen that is both practical and visually striking.
Open shelving serves multiple purposes in a kitchen:
- Displays decorative items and frequently used dishes
- Creates an open, airy feel
- Breaks up the visual weight of solid cabinetry
- Provides easy access to everyday items
- Allows for personalization and changing displays
When incorporating open shelving with navy blue cabinets, consider these design options:
| Shelf Material | Effect |
|---|---|
| Light wood | Adds warmth and contrast |
| Glass | Creates a sleek, modern look |
| Metal | Enhances industrial aesthetic |
| Painted to match cabinets | Provides a seamless appearance |
To make the most of your open shelving, follow these tips:
- Group items by color or function for a cohesive look
- Use a mix of practical and decorative items
- Incorporate plants or herbs for a touch of greenery
- Display cookbooks or vintage kitchen items for added character
- Use uniform containers for staples to create a tidy appearance
Open shelving works particularly well when paired with navy blue cabinets, as it provides a visual break from the solid color and allows you to introduce complementary hues through displayed items. For example, white dishes or copper cookware can create beautiful contrast against the deep blue background.
A custom island is another key element in enhancing the functionality of your kitchen. When designing a custom island to complement your navy blue cabinets, consider the following features:
- Contrasting countertop material (e.g., white marble or light quartz)
- Additional storage options (drawers, cabinets, or open shelving)
- Seating area for casual dining or socializing
- Built-in appliances (e.g., wine cooler, microwave, or prep sink)
- Task lighting for food preparation
The island can serve as a focal point in your kitchen, especially if you choose to make it a different color than your perimeter cabinets. A light-colored island, for instance, can create a striking contrast against navy blue cabinets while helping to brighten the space.
To maximize the functionality of your custom island, consider these design elements:
- Multi-level surfaces for different tasks (e.g., higher bar area for seating, lower area for food prep)
- Pull-out cutting boards or trash bins for added convenience
- Electrical outlets for small appliances or charging devices
- Specialized storage solutions (e.g., spice drawers, knife blocks, or pot racks)
- Pendant lighting to define the space and provide task lighting
When incorporating both open shelving and a custom island, it’s important to maintain a balance in your kitchen design. Here are some ways to achieve this:
- Use consistent hardware across open shelving brackets and island cabinets
- Repeat materials or colors from the perimeter cabinets in the island design
- Align open shelving with island dimensions for a cohesive look
- Use lighting to highlight both the open shelving and the island
- Incorporate the faux brick backsplash element into the island design for continuity
To further enhance the functionality of your kitchen, consider these additional features:
- A pot filler faucet installed near the cooktop for convenience
- A built-in chopping block or butcher block section on the island
- Under-cabinet task lighting to illuminate work areas
- Pull-out pantry storage for easy access to dry goods
- A designated coffee or beverage station within the island
By thoughtfully combining open shelving, a custom island, and navy blue cabinets, you can create a kitchen that is not only visually appealing but also highly functional. The open shelving provides opportunities for display and easy access, while the custom island serves as a multifunctional workspace and gathering point.
To tie everything together, use consistent design elements throughout the kitchen. For example:
- Repeat the brass hardware from your cabinets on open shelving brackets and island fixtures
- Use the same countertop material on both the perimeter cabinets and the island for a cohesive look
- Incorporate the faux brick texture from the backsplash into a feature wall or island accent
- Choose lighting fixtures that complement both the open shelving and the island design
Remember that the key to a successful kitchen design is finding the right balance between aesthetics and functionality. Your navy blue cabinets provide a strong visual foundation, while the open shelving and custom island add layers of practicality and personal style.
To ensure that your kitchen remains functional and beautiful over time, consider these maintenance tips:
- Use appropriate cleaners for your cabinet and countertop materials to preserve their finish
- Regularly declutter open shelving to maintain a tidy appearance
- Update displayed items seasonally to keep the space feeling fresh
- Clean and oil wooden shelving or butcher block surfaces as needed
- Touch up any chips or scratches on cabinetry promptly to prevent further damage
By incorporating these elements and following these guidelines, you can create a kitchen that not only looks stunning with its navy blue cabinets, faux brick backsplash, open shelving, and custom island but also functions efficiently for all your cooking and entertaining needs.
As we conclude our exploration of transforming your kitchen with bold design choices, it’s clear that the combination of navy blue cabinets, a faux brick backsplash, open shelving, and a custom island can create a space that is both visually striking and highly functional. This approach allows you to express your personal style while ensuring that your kitchen meets all your practical needs.
Now that we have covered these transformative kitchen design elements, we’ll next explore how to revitalize your living space with quick and affordable updates. These upcoming tips will complement the bold choices made in your kitchen, ensuring that the rest of your home maintains the same level of style and functionality.
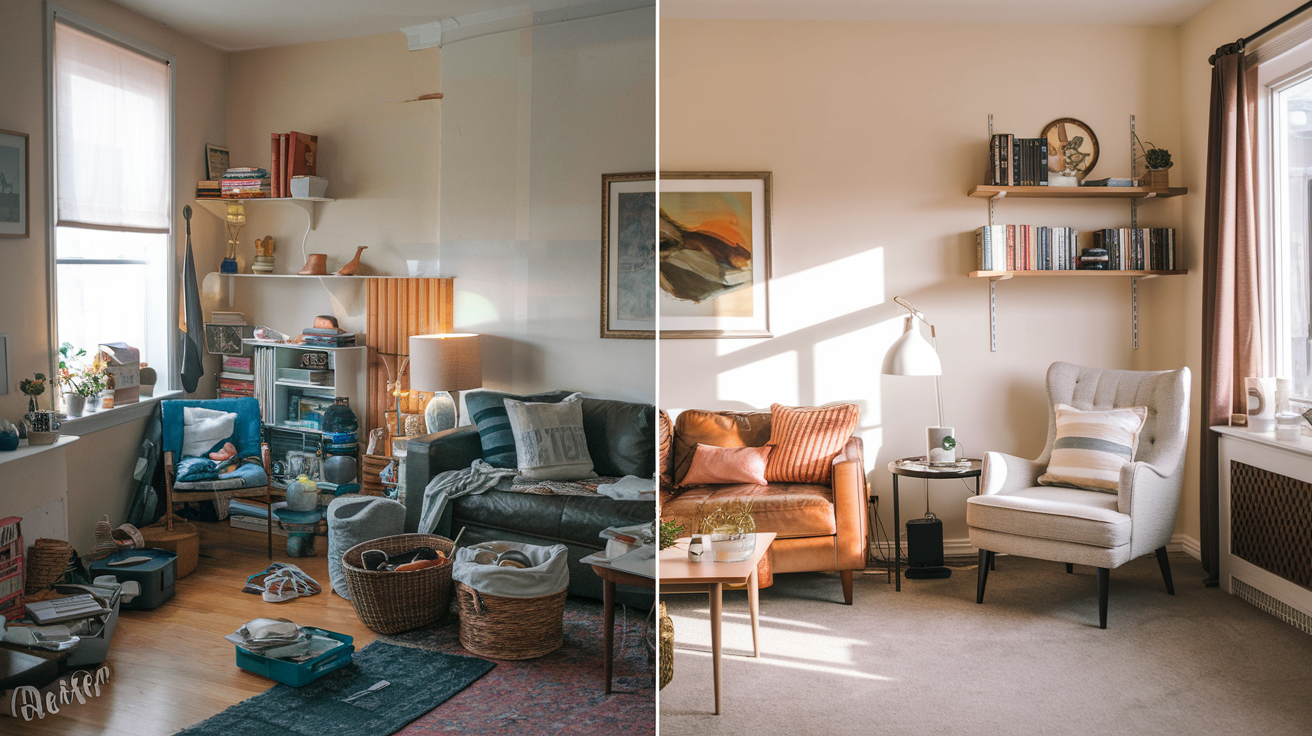
Revitalize Your Living Space with Quick and Affordable Updates
Now that we’ve explored bold design choices for kitchen transformations, let’s shift our focus to quick and affordable updates that can revitalize your entire living space. My Home Twitza offers a range of innovative solutions to breathe new life into your home without breaking the bank.
A. Update cabinet hardware for an instant refresh
Updating cabinet hardware is a simple yet effective way to give your living space a fresh look. This quick and budget-friendly approach can dramatically change the appearance of your kitchen, bathroom, or any room with cabinets. Here’s how you can make the most of this update:
Choose complementary styles: Select hardware that complements your existing decor. For a modern look, opt for sleek, minimalist handles. For a more traditional feel, consider ornate knobs or pulls.
Mix and match: Don’t be afraid to combine different styles of hardware. Mixing knobs and pulls can add visual interest and depth to your cabinetry.
Consider finishes: The finish of your hardware can drastically alter the overall look. Popular options include:
Finish Effect Brushed nickel Modern and versatile Oil-rubbed bronze Rustic and warm Polished chrome Sleek and contemporary Brass Vintage and elegant Size matters: Ensure the new hardware is appropriately sized for your cabinets. Measure the existing hardware and choose replacements that fit the same hole pattern to avoid additional drilling.
Coordinate with other elements: Consider coordinating your new hardware with other metal finishes in the room, such as light fixtures or appliances, for a cohesive look.
DIY installation: Installing new hardware is a simple DIY project that can be completed in an afternoon. All you need is a screwdriver and some patience.
Temporary solutions: For renters or those hesitant to commit, consider removable options like adhesive pulls or magnetic knobs that can be easily changed without damaging the cabinets.
Upcycle existing hardware: If new hardware isn’t in the budget, consider painting or refinishing your existing pieces for a fresh look.
Statement pieces: Use unique or artisanal hardware as statement pieces to add character to plain cabinets.
Consistent theme: Choose hardware that aligns with your overall design theme, whether it’s farmhouse, industrial, or mid-century modern.
By updating your cabinet hardware, you can achieve a significant visual impact with minimal effort and expense. This simple change can set the tone for further updates throughout your living space.
B. Use mosaic tiles to add creative flair to kitchen islands
Mosaic tiles offer a fantastic opportunity to infuse personality and visual interest into your kitchen island. This versatile design element can transform a plain surface into a stunning focal point. Here’s how you can incorporate mosaic tiles to elevate your kitchen island:
Choose your style: Mosaic tiles come in various materials, colors, and patterns. Consider options like:
- Glass tiles for a sleek, modern look
- Stone tiles for a natural, organic feel
- Ceramic tiles for durability and variety
- Metal tiles for an industrial edge
Color coordination: Select mosaic tiles that complement your kitchen’s color scheme. You can either match existing colors or use contrasting hues to make a bold statement.
Pattern play: Experiment with different patterns to create visual interest:
Pattern Effect Geometric Modern and structured Floral Soft and decorative Abstract Artistic and unique Gradient Subtle and sophisticated Placement options:
- Cover the entire island face for a dramatic effect
- Create a decorative band around the island’s perimeter
- Apply tiles to just one side as an accent feature
- Use tiles to create a unique backsplash behind the island
Grout considerations: The color of your grout can significantly impact the overall look. Dark grout can make individual tiles pop, while light grout creates a more seamless appearance.
Lighting enhancement: Consider adding under-cabinet lighting to highlight your mosaic tile work and create ambiance.
DIY-friendly options: For those comfortable with DIY projects, peel-and-stick mosaic tiles offer an easy-to-install alternative to traditional tiling methods.
Mix materials: Combine mosaic tiles with other materials like wood or stainless steel for a multi-textured look.
Focal point creation: Use a bold mosaic design as a centerpiece on the island, surrounded by more subdued tiles or solid surfaces.
Practical considerations: Ensure the tiles you choose are suitable for kitchen use, considering factors like water resistance and ease of cleaning.
Scale appropriately: Choose tile sizes that complement the size of your island. Smaller tiles work well on compact islands, while larger tiles can be more suitable for expansive surfaces.
Incorporate meaningful designs: Use mosaic tiles to create personalized designs, such as family crests, favorite quotes, or abstract representations of meaningful symbols.
Extend the theme: Consider carrying the mosaic tile theme to other areas of the kitchen, such as backsplashes or flooring, for a cohesive look.
Seasonal versatility: Opt for neutral-toned mosaic tiles that allow you to change the overall look of your kitchen with seasonal decor and accessories.
Eco-friendly options: Look for mosaic tiles made from recycled materials to add an environmentally conscious touch to your kitchen design.
By incorporating mosaic tiles into your kitchen island design, you can create a unique and eye-catching feature that reflects your personal style while adding value to your home.
C. Apply peel-and-stick wood planking for dramatic impact
Peel-and-stick wood planking offers a quick and affordable way to add warmth, texture, and character to your living space. This versatile material can transform walls, ceilings, or even furniture with minimal effort and expense. Here’s how you can use peel-and-stick wood planking to create a dramatic impact in your home:
Choose your style: Peel-and-stick wood planking comes in various finishes and colors:
Style Effect Rustic barnwood Weathered and charming Sleek walnut Modern and sophisticated Whitewashed pine Coastal and airy Rich mahogany Luxurious and warm Accent walls: Create a stunning focal point by applying wood planking to a single wall in your living room, bedroom, or dining area.
Ceiling applications: Transform a plain ceiling into a striking architectural feature by applying wood planking overhead.
Furniture makeovers: Breathe new life into old furniture by applying wood planking to dresser fronts, tabletops, or cabinet doors.
Kitchen island upgrade: Wrap your kitchen island in wood planking for a rustic-chic look that complements various design styles.
Headboard alternative: Create a unique headboard by applying wood planking to the wall behind your bed.
Bathroom refresh: Use water-resistant wood planking to add warmth and texture to bathroom walls or vanities.
Entryway impact: Make a strong first impression by applying wood planking to your entryway walls or ceiling.
Pattern play: Experiment with different plank layouts:
- Horizontal for a classic look
- Vertical to create the illusion of height
- Herringbone for added visual interest
- Diagonal for a dynamic effect
Mix and match: Combine different wood tones or colors to create custom patterns or ombre effects.
Frame it out: Use trim pieces to frame your wood planking installation for a polished, built-in look.
Incorporate lighting: Install sconces or picture lights to highlight your wood planking and create ambiance.
Blend with existing elements: Choose wood planking that complements your existing flooring, furniture, or trim for a cohesive look.
Texture contrast: Use smooth wood planking in rooms with lots of textured fabrics, or vice versa, to create balance.
Optical illusions: Use wood planking to visually alter the shape of a room. Horizontal planks can make a room feel wider, while vertical planks can make ceilings appear higher.
Zoning technique: Use wood planking to define specific areas in open-concept spaces, such as dining or work zones.
Seamless transitions: Extend wood planking from walls onto built-in shelving or cabinetry for a custom, high-end look.
Removable option: For renters or those who like to change decor frequently, choose easily removable peel-and-stick planking that won’t damage walls.
Layered look: Apply wood planking over existing textures like brick or concrete for a unique, multi-dimensional effect.
Outdoor applications: Use weather-resistant wood planking to enhance outdoor living spaces like covered patios or poolside areas.
Implementing peel-and-stick wood planking is an excellent way to add warmth and character to your living space without the need for extensive renovations or professional installation. This versatile material allows you to create dramatic transformations quickly and affordably, making it an ideal choice for those looking to refresh their home’s aesthetic.
As we’ve explored these quick and affordable updates to revitalize your living space, it’s clear that small changes can have a significant impact on the overall look and feel of your home. From updating cabinet hardware to adding mosaic tiles and applying peel-and-stick wood planking, these transformations can breathe new life into your surroundings without breaking the bank.
With these updates in place, you may find yourself inspired to tackle other areas of your home. In the next section, we’ll delve into strategies for maximizing storage and organization in every room, building upon the refreshed aesthetic you’ve created to ensure your living space is not only beautiful but also functional and clutter-free.
Maximize Storage and Organization in Every Room
Now that we have covered how to revitalize your living space with quick and affordable updates, let’s dive into maximizing storage and organization in every room of your home. My Home Twitza offers innovative solutions to transform your living space overnight, and proper storage is a crucial aspect of this transformation.
A. Install mirrored cabinets in bathrooms for extra storage and visual space
Bathrooms often present unique storage challenges due to their limited space and high moisture content. Mirrored cabinets offer an elegant solution that not only provides additional storage but also enhances the visual appeal of your bathroom. Here’s how you can make the most of this storage option:
Maximize vertical space: Install floor-to-ceiling mirrored cabinets to take full advantage of your bathroom’s vertical space. This strategy allows you to store a significant amount of items without compromising on floor area.
Utilize wall-mounted organization: Incorporate wall-mounted mirrored cabinets with built-in shelves and compartments. This approach keeps your toiletries, medicines, and beauty products organized and easily accessible while maintaining a clutter-free countertop.
Enhance lighting: Choose mirrored cabinets with integrated LED lighting to improve visibility and create a more spacious feel in your bathroom. This feature is particularly useful for applying makeup or grooming tasks.
Opt for adjustable shelving: Select mirrored cabinets with adjustable shelves to accommodate items of various sizes. This flexibility allows you to customize the storage space according to your changing needs.
Consider recessed installations: For a sleek and streamlined look, consider recessing your mirrored cabinets into the wall. This technique saves even more space and creates a built-in appearance.
Implement smart storage solutions: Look for mirrored cabinets with additional features such as magnetic strips for small metal items, hooks for hanging towels or robes, and built-in electrical outlets for charging devices.
Use chalkboard labels: Apply chalkboard labels to the inside of your mirrored cabinet doors to keep track of contents and expiration dates for medicines and beauty products.
Incorporate pull-out organizers: Choose mirrored cabinets with pull-out organizers or drawers to maximize storage efficiency and keep smaller items from getting lost in the back of the cabinet.
Utilize door space: Take advantage of the inside of cabinet doors by adding hooks or small baskets for storing frequently used items like toothbrushes, razors, or hair accessories.
Implement a color-coding system: Use colored containers or labels within your mirrored cabinets to organize items by category or family member, making it easier to find what you need quickly.
By implementing these strategies, you can transform your bathroom into a well-organized and visually appealing space that maximizes storage while creating the illusion of a larger room.
B. Create a walk-in closet from unused bedroom space
Transforming unused bedroom space into a walk-in closet is an excellent way to maximize storage and organization in your home. This project not only adds value to your property but also provides a dedicated space for your wardrobe and accessories. Here’s how you can create a functional and stylish walk-in closet:
Assess available space: Evaluate the unused area in your bedroom to determine the ideal location and dimensions for your walk-in closet. Consider factors such as natural light, existing electrical outlets, and proximity to your bed.
Design a customized layout: Plan a layout that maximizes storage efficiency while maintaining ease of access. Consider the following elements:
- Hanging rods at various heights for different types of clothing
- Shelving units for folded items and accessories
- Drawers for smaller items and undergarments
- Shoe racks or cubbies
- A central island or seating area, if space permits
Implement an Adaptive Modular Closet System: Utilize a flexible framework that allows for easy reconfiguration as your storage needs change over time. This system typically includes:
- Adjustable shelves and hanging rods
- Modular drawers and cubbies
- Tool-free assembly and adjustment options
Maximize vertical space: Install floor-to-ceiling storage solutions to take full advantage of the available vertical space. Consider adding:
- Double hanging rods for shorter items like shirts and skirts
- High shelves for seasonal or less frequently used items
- Pull-down rods for hard-to-reach areas
Incorporate smart storage technology: Enhance your walk-in closet with innovative storage solutions, such as:
- Smart Vacuum-Sealed Drawer Units for compressing and protecting clothing
- Augmented Reality (AR) Labeling Containers for efficient organization
- App-connected inventory management systems
Optimize lighting: Install adequate lighting to ensure visibility and create an inviting atmosphere. Consider:
- Recessed LED lighting for overall illumination
- Task lighting for specific areas like jewelry displays or dressing mirrors
- Motion-activated lights for energy efficiency
Create designated zones: Organize your walk-in closet into distinct areas for different types of clothing and accessories. For example:
- Work attire section
- Casual wear area
- Formal wear and special occasion outfits
- Accessories and jewelry display
Implement a color-coding system: Use colored hangers, bins, or labels to categorize items by type, season, or frequency of use. This system makes it easier to locate and maintain your wardrobe.
Incorporate multi-functional furniture: If space allows, add furniture pieces that serve dual purposes, such as:
- An ottoman with hidden storage for extra linens or off-season items
- A vanity that doubles as a workspace or dressing area
- A full-length mirror with built-in jewelry storage
Utilize often-overlooked spaces: Maximize storage potential by making use of every available area:
- Install hooks or racks on the back of the closet door
- Use corner shelves or rotating organizers for awkward spaces
- Add under-shelf baskets for additional storage without sacrificing shelf space
Implement a jewelry and accessory organization system: Create dedicated storage solutions for smaller items:
- Install a wall-mounted pegboard for hanging necklaces and bracelets
- Use drawer inserts with compartments for rings and earrings
- Add a tie rack or belt organizer to keep accessories tidy and accessible
Incorporate sustainable materials: Choose eco-friendly materials for your closet system, such as:
- Bamboo or reclaimed wood for shelving
- Recycled plastic for storage containers
- Low-VOC finishes for a healthier indoor environment
By following these guidelines, you can transform unused bedroom space into a highly functional and organized walk-in closet that not only stores your belongings efficiently but also adds value to your home.
C. Add designer cabinets to optimize garage organization
The garage is often an overlooked space when it comes to home organization, but with the right storage solutions, it can become a highly functional and efficient area. Designer cabinets offer a stylish and practical way to optimize garage organization. Here’s how you can transform your garage with My Home Twitza’s innovative storage solutions:
Assess your storage needs: Before installing designer cabinets, take inventory of the items you need to store in your garage. Categorize them into groups such as:
- Tools and equipment
- Sporting goods
- Seasonal decorations
- Automotive supplies
- Gardening tools and supplies
- household items
Plan your layout: Design a layout that maximizes space utilization and accessibility. Consider the following factors:
- Traffic flow in the garage
- Placement of large items like vehicles or workbenches
- Frequency of use for different categories of items
- Height of the garage ceiling for potential overhead storage
Choose appropriate cabinet types: Select a combination of cabinet styles to accommodate various storage needs:
Cabinet Type Best For Features Wall-mounted cabinets Tools, paint cans, cleaning supplies Keeps items off the floor, adjustable shelves Floor cabinets Heavy equipment, power tools Sturdy construction, lockable doors Tall cabinets Sporting equipment, long-handled tools Vertical storage, adjustable shelving Corner cabinets Maximizing awkward spaces Custom-fit designs, rotating shelves Overhead cabinets Seasonal items, rarely used equipment Utilizes ceiling space, pull-down access Implement modular designs: Opt for modular cabinet systems that allow for easy reconfiguration as your storage needs change over time. These systems typically offer:
- Interchangeable components
- Adjustable shelving and drawer configurations
- The ability to add or remove units as needed
Incorporate specialized storage solutions: Enhance your designer cabinets with built-in organizers tailored to specific items:
- Tool organizers with foam inserts for easy identification and access
- Pull-out drawers for small hardware and fasteners
- Slat wall systems for hanging tools and equipment
- Pegboard backing for customizable tool storage
Utilize vertical space: Maximize storage capacity by taking advantage of vertical wall space:
- Install floor-to-ceiling cabinets to make use of the entire wall height
- Use adjustable shelving to accommodate items of various sizes
- Incorporate hanging systems for bikes, ladders, and other bulky items
Implement smart storage technology: Enhance your garage organization with innovative features:
- Smart locks for secure storage of valuable tools and equipment
- Inventory management systems with barcode scanning for easy item tracking
- Motion-activated lighting inside cabinets for improved visibility
Choose durable materials: Select cabinets made from materials that can withstand the garage environment:
- Powder-coated steel for durability and resistance to moisture and chemicals
- High-density polyethylene (HDPE) for impact resistance and easy cleaning
- Marine-grade plywood for moisture resistance in humid climates
Incorporate workspaces: Integrate functional work areas into your cabinet design:
- Fold-down workbenches that can be tucked away when not in use
- Built-in charging stations for power tools and electronics
- Task lighting for detailed work and improved visibility
Implement a color-coding system: Use color to organize and identify items quickly:
- Assign different colors to various categories of tools or equipment
- Use colored labels or bins within cabinets for easy identification
- Consider cabinet doors in different colors to designate specific storage areas
Add mobile storage solutions: Complement your fixed cabinets with mobile units for added flexibility:
- Rolling tool chests for easy access to frequently used items
- Mobile workbenches that can be moved as needed
- Utility carts for transporting tools and supplies around the garage
Incorporate safety features: Ensure your garage storage is safe and secure:
- Install childproof locks on cabinets containing hazardous materials
- Use fire-resistant cabinets for storing flammable liquids
- Implement proper ventilation for cabinets storing chemicals or paints
Optimize cabinet interiors: Maximize the efficiency of your cabinet interiors with these strategies:
- Use drawer dividers to keep small items organized
- Install pull-out shelves for easy access to items at the back of deep cabinets
- Add hooks or racks to the inside of cabinet doors for additional storage
Consider overhead storage: Utilize ceiling space for additional storage options:
- Install overhead racks for storing bulky or seasonal items
- Use motorized lifts for easy access to overhead storage
- Implement pull-down storage systems for frequently used items
Maintain flexibility: Design your garage storage system to adapt to changing needs:
- Leave some open space for future additions or large items
- Choose cabinets with adjustable components for evolving storage requirements
- Plan for potential expansion of your storage system
By implementing these strategies, you can transform your garage into a well-organized, functional space that complements the rest of your home. Designer cabinets not only provide ample storage but also contribute to a clean, professional appearance that enhances the overall value of your property.
As we’ve explored the various ways to maximize storage and organization in every room of your home, from installing mirrored cabinets in bathrooms to creating walk-in closets and optimizing garage organization with designer cabinets, it’s clear that My Home Twitza offers innovative solutions to transform your living space overnight. These storage improvements not only enhance the functionality of your home but also contribute to a more organized and stress-free living environment.
With this in mind, next, we’ll see how My Home Twitza can help enhance home safety and comfort, building upon the foundation of a well-organized living space. By addressing these crucial aspects of home improvement, you’ll be well on your way to creating a living environment that is not only efficient and organized but also secure and comfortable for you and your family.
Enhance Home Safety and Comfort
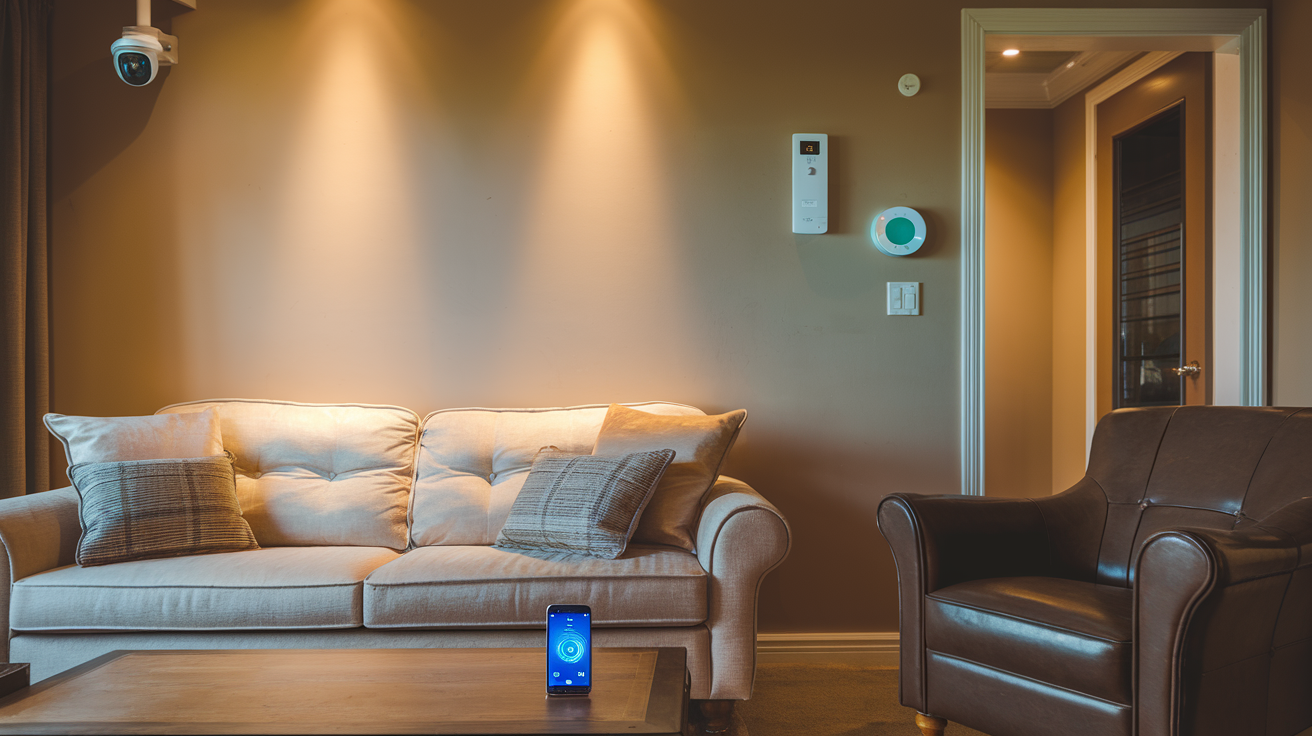
Now that we’ve explored how to maximize storage and organization in every room, let’s shift our focus to enhancing home safety and comfort with ‘My Home Twitza’. These transformations not only improve the aesthetic appeal of your living space but also create a safer and more comfortable environment for you and your loved ones.
Carpet stairs for improved safety and aesthetic appeal
Carpeting your stairs is a simple yet effective way to enhance both safety and style in your home. This modification addresses two crucial aspects of home improvement: reducing fall risks and elevating the visual appeal of your living space.
Safety Benefits of Carpeted Stairs
Improved Traction: Carpeted stairs provide better grip underfoot, significantly reducing the risk of slips and falls. This is particularly important for households with elderly members or young children.
Cushioning Effect: In the event of a fall, carpet offers a softer landing surface compared to hardwood or tile, potentially minimizing injury severity.
Noise Reduction: Carpeted stairs absorb sound, creating a quieter and more peaceful home environment.
Enhanced Visibility: With proper selection of carpet color and texture, you can improve the visual distinction between steps, making it easier to navigate the staircase.
Aesthetic Advantages
Visual Warmth: Carpet adds warmth and coziness to your staircase, creating a more inviting atmosphere in your home.
Design Flexibility: With a wide range of colors, patterns, and textures available, carpeted stairs offer endless possibilities for customization to match your home’s decor.
Seamless Integration: Carpet can help blend your staircase with the surrounding areas, creating a cohesive look throughout your home.
Concealment of Imperfections: Carpet can hide minor flaws or wear on older staircases, giving them a fresh, updated appearance.
Choosing the Right Carpet for Your Stairs
When selecting carpet for your stairs, consider the following factors:
| Factor | Consideration |
|---|---|
| Durability | Choose a high-quality, dense carpet that can withstand heavy foot traffic |
| Pile Height | Opt for a low-pile carpet (less than 3/4 inch) for easier cleaning and reduced tripping hazard |
| Material | Select synthetic fibers like nylon or polyester for better stain resistance and longevity |
| Color | Choose a color that complements your home’s decor while being dark enough to hide dirt and wear |
| Pattern | Consider a subtle pattern to help disguise wear and tear over time |
Installation Tips
Professional Installation: For best results, hire a professional carpet installer experienced in stair carpeting.
Proper Padding: Use a high-quality, thin carpet pad designed specifically for stairs to enhance comfort and extend carpet life.
Secure Fastening: Ensure the carpet is tightly stretched and securely fastened to prevent slipping or bunching.
Regular Maintenance: Vacuum regularly and clean spills promptly to maintain the carpet’s appearance and safety features.
By carpeting your stairs, you’re not only creating a safer environment but also adding a touch of elegance to your home. This simple modification can significantly impact the overall look and feel of your living space while providing peace of mind for you and your family.
Soften hard surfaces with textiles like Roman blinds
Incorporating soft textiles into your home design is an excellent way to enhance comfort and safety while adding a touch of sophistication. Roman blinds, in particular, offer a perfect blend of functionality and style, making them an ideal choice for softening hard surfaces in your living space.
Benefits of Using Roman Blinds
Light Control: Roman blinds provide excellent light control, allowing you to adjust the amount of natural light entering your room throughout the day.
Insulation: These blinds can help insulate your windows, improving energy efficiency and reducing heating and cooling costs.
Sound Absorption: Fabric blinds help absorb sound, creating a quieter and more peaceful environment.
Versatility: Roman blinds come in a wide range of fabrics, colors, and patterns, making them suitable for any room or decor style.
Space-Saving: Unlike curtains, Roman blinds take up minimal space, making them ideal for smaller rooms or areas with limited wall space.
Selecting the Right Roman Blinds for Your Home
When choosing Roman blinds, consider the following factors:
| Factor | Consideration |
|---|---|
| Fabric | Choose a fabric that complements your room’s decor and meets your practical needs (e.g., blackout, sheer, or lined) |
| Color | Select a color that harmonizes with your existing color scheme or adds a desired pop of color |
| Pattern | Opt for solid colors for a sleek look or patterns to add visual interest |
| Lining | Consider adding a lining for better insulation and light control |
| Mechanism | Choose between cord-operated or cordless options, keeping safety in mind, especially for homes with children or pets |
Installation and Maintenance Tips
Proper Measurements: Ensure accurate measurements of your windows for a perfect fit.
Professional Installation: Consider professional installation for a polished look and optimal functionality.
Regular Cleaning: Vacuum or dust your Roman blinds regularly to maintain their appearance.
Spot Cleaning: Address spills or stains promptly using appropriate cleaning methods for the fabric type.
Periodic Inspection: Check the mechanisms and cords regularly to ensure smooth operation and safety.
Other Textiles to Soften Hard Surfaces
While Roman blinds are an excellent choice, there are other textile options to consider for softening hard surfaces in your home:
Curtains and Drapes: These classic window treatments offer a wide range of styles and can dramatically soften a room’s appearance.
Area Rugs: Use area rugs to add warmth and comfort to hard flooring surfaces like wood or tile.
Throw Pillows and Blankets: Incorporate these accessories on sofas, chairs, and beds to add texture and coziness.
Upholstered Furniture: Choose furniture with soft, textured fabrics to create a more inviting seating area.
Wall Tapestries: Hang fabric wall art to soften the appearance of large, bare walls.
Creating a Cohesive Look with Textiles
To achieve a harmonious design throughout your home:
Choose a Color Palette: Select a cohesive color scheme that ties your textiles together.
Mix Textures: Combine different fabric textures to add depth and interest to your space.
Balance Patterns: If using patterned textiles, balance them with solid colors to avoid visual overwhelm.
Consider Scale: Use larger patterns in bigger rooms and smaller patterns in more intimate spaces.
Layer Textiles: Combine different textile elements (e.g., curtains, rugs, and pillows) to create a rich, inviting atmosphere.
By incorporating Roman blinds and other soft textiles into your home, you can significantly enhance the comfort and safety of your living space. These additions not only soften hard surfaces but also contribute to a more inviting and visually appealing environment. The versatility of textiles allows you to easily update your home’s look and feel without major renovations, making them an excellent choice for quick and impactful home transformations.
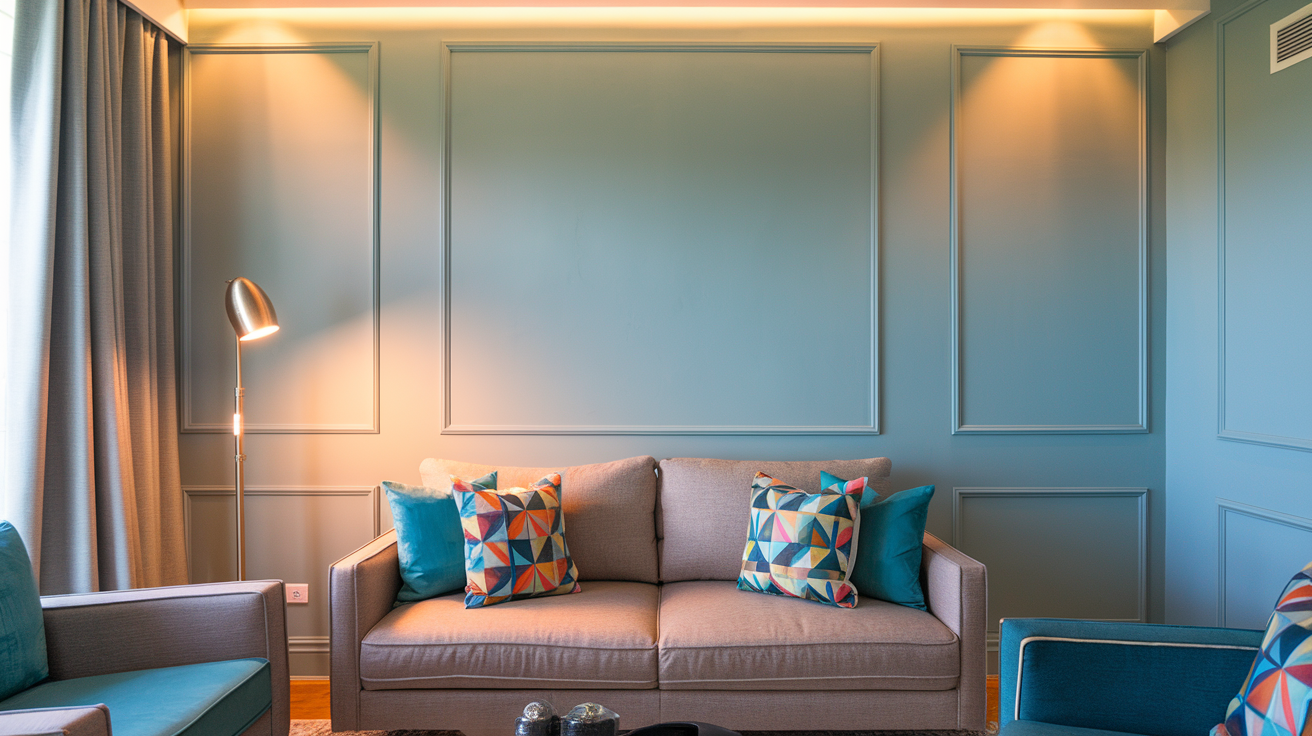
Create cozy, vintage-inspired environments with soft fabrics
Incorporating soft fabrics into your home decor is an excellent way to create a cozy, vintage-inspired atmosphere that enhances both comfort and safety. This approach not only adds warmth and texture to your living space but also contributes to a more inviting and nostalgic ambiance. Let’s explore how you can use soft fabrics to transform your home into a comfortable haven with a touch of vintage charm.
Choosing Vintage-Inspired Fabrics
When selecting fabrics for a vintage-inspired look, consider the following options:
- Velvet: Luxurious and soft, velvet adds a touch of elegance and warmth to any room.
- Linen: Natural and breathable, linen offers a relaxed, timeless appeal.
- Cotton: Versatile and comfortable, cotton fabrics come in a variety of vintage-inspired prints and textures.
- Chenille: Known for its soft, fuzzy texture, chenille adds coziness and visual interest.
- Lace: Delicate and intricate, lace can add a romantic, vintage touch to your decor.
- Brocade: Ornate and textured, brocade fabrics bring a sense of opulence to your vintage-inspired space.
Incorporating Soft Fabrics in Different Areas of Your Home
Let’s explore how you can use soft fabrics to create cozy, vintage-inspired environments throughout your home:
Living Room
- Upholstery: Choose sofas and armchairs with soft, vintage-inspired fabrics like velvet or linen.
- Throw Pillows: Add a variety of textured pillows in complementary colors and patterns.
- Curtains: Opt for floor-length curtains in heavy fabrics like velvet or brocade for a luxurious feel.
- Area Rugs: Layer soft, plush rugs to add warmth and define seating areas.
- Throw Blankets: Drape soft, knitted or crocheted blankets over furniture for added coziness.
Bedroom
- Bedding: Choose soft, vintage-inspired bedding sets with floral prints or delicate patterns.
- Headboard: Create a fabric-covered headboard using tufted velvet or linen for a classic look.
- Canopy: Install a fabric canopy over the bed for a romantic, vintage touch.
- Window Treatments: Use lace curtains or Roman shades in soft, muted colors.
- Accent Chair: Add a cozy reading nook with a plush, fabric-covered armchair.
Dining Room
- Tablecloth: Use a vintage-inspired tablecloth in linen or cotton with delicate embroidery.
- Chair Cushions: Add comfort to dining chairs with soft, fabric-covered seat cushions.
- Napkins: Choose cloth napkins in complementary colors and patterns.
- Wall Hangings: Display vintage-inspired tapestries or fabric wall art.
- Rug: Place a soft area rug under the dining table to define the space and add warmth.
Kitchen
- Tea Towels: Hang vintage-inspired tea towels with nostalgic prints or embroidery.
- Seat Cushions: Add fabric-covered cushions to kitchen chairs or bar stools.
- Window Treatments: Install cafe curtains or Roman shades in soft, vintage-inspired fabrics.
- Table Runner: Use a fabric table runner on your kitchen island or breakfast nook table.
- Rug: Place a soft, washable rug in front of the sink or stove for comfort and safety.
Creating a Cohesive Vintage-Inspired Look
To achieve a harmonious vintage-inspired atmosphere throughout your home, consider the following tips:
- Color Palette: Choose a cohesive color scheme that reflects vintage aesthetics, such as muted pastels, warm neutrals, or rich jewel tones.
- Mix and Match: Combine different fabric textures and patterns to create visual interest while maintaining a vintage feel.
- Layering: Use multiple layers of soft fabrics to add depth and coziness to your spaces.
- Accessories: Incorporate vintage-inspired accessories like embroidered pillows, crocheted doilies, or needlepoint art to enhance the overall look.
- Lighting: Use soft, warm lighting to complement the cozy atmosphere created by the fabrics.
Vintage-Inspired Fabric Patterns and Motifs
To truly capture the essence of a vintage-inspired environment, consider incorporating these classic patterns and motifs:
- Floral Prints: From delicate roses to bold botanicals, floral patterns are quintessentially vintage.
- Toile: This classic French pattern featuring pastoral scenes adds a touch of elegance.
- Gingham: A timeless checked pattern that evokes a sense of nostalgia and charm.
- Paisley: This intricate, teardrop-shaped pattern adds visual interest and a bohemian touch.
- Polka Dots: Playful and classic, polka dots can range from subtle to bold.
- Damask: An ornate, symmetrical pattern that adds sophistication to any space.
DIY Vintage-Inspired Fabric Projects
Enhance your home’s cozy, vintage-inspired atmosphere with these DIY fabric projects:
- Patchwork Quilt: Create a cozy bed cover or throw using vintage-inspired fabric scraps.
- Fabric-Covered Books: Wrap old books in vintage fabrics for charming shelf decor.
- Embroidered Pillowcases: Add hand-embroidered details to plain pillowcases for a personal touch.
- Fabric Bunting: String together triangles of vintage-inspired fabrics for festive decor.
- Upholstered Footstool: Recover an old footstool with soft, vintage fabric for added comfort and style.
Maintaining Your Soft Fabric Decor
To keep your vintage-inspired soft fabrics looking their best:
- Regular Cleaning: Vacuum upholstery and curtains regularly to remove dust and debris.
- Spot Cleaning: Address spills promptly using appropriate cleaning methods for each fabric type.
- Professional Cleaning: Schedule periodic professional cleaning for larger items like rugs and upholstered furniture.
- Rotation: Rotate throw pillows and area rugs to ensure even wear.
- Sun Protection: Use sheer curtains or UV-blocking window film to protect fabrics from fading.
| Fabric Type | Cleaning Method | Special Care |
|---|---|---|
| Velvet | Gentle brushing, professional cleaning | Avoid crushing pile, use steamer for wrinkles |
| Linen | Machine wash on gentle cycle, air dry | Iron while damp for crisp look |
| Cotton | Machine wash, tumble dry on low | Pre-treat stains before washing |
| Chenille | Vacuum regularly, professional cleaning | Avoid excessive moisture |
| Lace | Hand wash or gentle machine cycle, air dry | Use mesh bag for machine washing |
| Brocade | Dry clean only | Avoid direct sunlight to prevent fading |
By incorporating soft, vintage-inspired fabrics throughout your home, you can create a cozy and inviting atmosphere that enhances both comfort and safety. These textiles not only add warmth and texture to your living spaces but also contribute to a nostalgic ambiance that makes your home feel truly special. From the living room to the bedroom, kitchen, and dining area, the strategic use of soft fabrics can transform your home into a comfortable haven with timeless charm.
As we’ve explored the various ways to enhance home safety and comfort through carpeted stairs, Roman blinds, and vintage-inspired soft fabrics, we’ve created a foundation for a more inviting and secure living space. These modifications not only improve the functionality of your home but also contribute to its overall aesthetic appeal. With these changes in place, you’re now ready to take your home transformation to the next level by experimenting with color and pattern, which we’ll explore in the next section. The soft textures and vintage-inspired elements we’ve incorporated will serve as an excellent backdrop for introducing new hues and designs, allowing you to further personalize your living space and create a truly unique home environment.
Experiment with Color and Pattern

Now that we’ve explored ways to enhance home safety and comfort, let’s dive into the exciting world of color and pattern experimentation. ‘My Home Twitza’ offers innovative solutions to transform your living space through bold design choices and vibrant aesthetics.
A. Wallpaper kitchen cabinets to add vibrant designs
Transforming your kitchen with vibrant designs can be achieved through an unexpected yet impactful method: wallpapering your kitchen cabinets. This innovative approach, championed by ‘My Home Twitza’, allows you to infuse personality and style into what is often considered the heart of the home.
When selecting wallpaper for your kitchen cabinets, consider drawing inspiration from nature-inspired palettes. The “Forest-Inspired” palette, featuring deep greens and earthy browns, can create a bold, graphic aesthetic that brings the outdoors in. Alternatively, the “Palm Springs Modern” palette, with its combination of citrine, ocean blue, and palm green, offers a vibrant touch ideal for bright, open kitchen spaces.
Here are some tips for successfully wallpapering your kitchen cabinets:
- Choose moisture-resistant wallpaper to ensure durability in the kitchen environment.
- Opt for patterns that complement your existing kitchen decor and color scheme.
- Consider using removable wallpaper for easier updates in the future.
- Apply wallpaper to the inside of glass-front cabinets for a subtle yet eye-catching effect.
- Use wallpaper on a single set of cabinets as a focal point in the kitchen.
To help you visualize the impact of different color palettes on your kitchen cabinets, consider the following comparison:
| Palette | Colors | Mood | Best for |
|---|---|---|---|
| Forest-Inspired | Deep greens, earthy browns | Bold, natural | Traditional or rustic kitchens |
| Palm Springs Modern | Citrine, ocean blue, palm green | Vibrant, energetic | Contemporary or mid-century modern kitchens |
| Rich Jewel Tones | Sapphire, emerald, amethyst | Luxurious, dramatic | Elegant or eclectic kitchens |
| Airy Neutrals | Taupe, ivory, soft gray | Calm, sophisticated | Minimalist or Scandinavian-style kitchens |
By incorporating these vibrant designs into your kitchen cabinets, you can create a unique and personalized space that reflects your style while adding a dynamic element to your home’s overall aesthetic.
B. Unify rooms with cohesive color schemes
Creating a harmonious flow throughout your home is essential for a polished and well-designed living space. ‘My Home Twitza’ emphasizes the importance of establishing cohesive color schemes to unify different rooms and create a sense of continuity. This approach not only enhances the overall aesthetic of your home but also contributes to a more balanced and visually pleasing environment.
To achieve a cohesive color scheme, consider the following strategies:
Define the desired atmosphere: Before selecting colors, determine the mood you want to create in your home. Whether you’re aiming for a calming ambiance with neutrals or a vibrant and playful atmosphere with bold colors, this decision will guide your color choices.
Survey your space: Take into account the layout of your home, particularly focusing on interconnected areas. Ensure that colors flow seamlessly from one room to another, creating visual harmony.
Select a dominant tone: Choose a primary color that will serve as the foundation for your color scheme. This dominant hue should be present in various forms throughout your home.
Incorporate color repetition: Use the dominant color in different ways across rooms to maintain consistency. This can be achieved through wall colors, furniture, accessories, or artwork.
Embrace the spectrum approach: Instead of using the exact same shade in every room, incorporate different tones within the same color family. This adds depth and interest while maintaining cohesion.
Balance with neutrals: Use neutral colors as a base to allow for the layering of other hues. This creates a cohesive backdrop for more vibrant accents.
Consider architectural context: Ensure that your color choices complement the architectural style of your home. For instance, historical homes may benefit from the “Historical Romance” palette, featuring soft gray, muted sage, and pale blue.
To illustrate how different color palettes can unify your home, consider the following examples:
| Color Palette | Primary Colors | Complementary Colors | Best for |
|---|---|---|---|
| Warm Earth Tones | Cacao, sandy beige | Terracotta, olive green | Creating an inviting, cozy atmosphere |
| Laid-Back Blues | Calming blues | Light oak, creamy whites | Achieving a relaxed, coastal-inspired look |
| Desert Chic | Warm neutrals, earthy tones | Rust, sage green | Evoking a California desert vibe |
| High-Contrast Neutrals | Black, ivory | Charcoal gray, warm wood tones | Modern, minimalist interiors |
When implementing a cohesive color scheme, remember to:
- Use the 60-30-10 rule: Apply the dominant color to 60% of the space, a secondary color to 30%, and an accent color to 10%.
- Incorporate unexpected pops of color in private spaces like bedrooms or home offices.
- Mix materials and textures to add depth and interest, even within a neutral palette.
- Consider inverting color schemes from room to room for a subtle yet cohesive transition.
- Use textiles strategically to introduce or reinforce color choices throughout your home.
By following these guidelines, you can create a unified and harmonious color scheme that flows seamlessly from room to room, enhancing the overall aesthetic of your home.
C. Use bold wallpaper in powder rooms for maximum impact
Powder rooms offer a unique opportunity to make a bold design statement, and ‘My Home Twitza’ encourages homeowners to embrace this potential through the use of striking wallpaper. These small spaces are perfect for experimenting with daring patterns and colors that might be overwhelming in larger areas of the home.
When selecting wallpaper for your powder room, consider the following factors:
Scale: Choose patterns that complement the size of the room. Larger prints can make a small space feel more expansive, while smaller patterns can add intricate detail.
Color intensity: Opt for vibrant hues or rich jewel tones to create a memorable impression. The “Rich Jewel Tones” palette, featuring colors like sapphire, emerald, and amethyst, can be particularly effective in powder rooms.
Theme: Select a wallpaper design that reflects your personal style or complements the overall aesthetic of your home. This could range from nature-inspired motifs to geometric patterns or even abstract art.
Texture: Consider textured wallpapers to add depth and interest to the space. Options like grasscloth, silk, or embossed patterns can elevate the luxurious feel of your powder room.
Lighting: Take into account the room’s lighting when choosing wallpaper. Darker colors may require additional lighting to prevent the space from feeling cramped.
Here are some bold wallpaper ideas to consider for your powder room:
| Wallpaper Style | Description | Best for |
|---|---|---|
| Tropical Botanicals | Large-scale leaf patterns in vibrant greens | Creating a lush, exotic atmosphere |
| Art Deco Geometrics | Gold and black patterns with angular designs | Achieving a glamorous, vintage-inspired look |
| Watercolor Abstracts | Fluid, colorful designs reminiscent of paintings | Adding an artistic, contemporary touch |
| Chinoiserie | Intricate Asian-inspired scenes in rich colors | Infusing elegance and cultural flair |
| Oversized Florals | Dramatic, large-scale flower patterns | Making a romantic, feminine statement |
To maximize the impact of bold wallpaper in your powder room:
Consider covering all walls: In a small space like a powder room, fully committing to a bold pattern can create a cohesive and immersive experience.
Pair with complementary fixtures: Choose bathroom fixtures and accessories that complement or contrast with the wallpaper design. For example, brass fixtures can enhance the warmth of jewel-toned wallpapers.
Use wallpaper as art: Select a statement wallpaper that serves as a focal point, eliminating the need for additional artwork in the space.
Balance with neutral elements: If the wallpaper is particularly bold, consider balancing it with neutral-colored countertops or flooring to prevent visual overwhelm.
Extend to the ceiling: For a truly dramatic effect, continue the wallpaper onto the ceiling to create an enveloping, jewel-box effect.
Frame the wallpaper: Use molding or trim to frame sections of wallpaper, creating a paneled effect that adds architectural interest.
Mix patterns strategically: If you’re feeling adventurous, consider combining multiple patterns within the powder room. Ensure they share a common color palette for cohesion.
When incorporating bold wallpaper into your powder room, keep these additional tips in mind:
- Ensure proper ventilation to protect the wallpaper from moisture damage.
- Use high-quality, moisture-resistant wallpaper designed for bathroom environments.
- Consider the placement of mirrors and how they will reflect the wallpaper pattern.
- Test wallpaper samples in the space before committing to ensure the color and pattern work well with the room’s lighting and existing elements.
By using bold wallpaper in your powder room, you can create a memorable and impactful space that leaves a lasting impression on guests. This approach allows you to experiment with daring designs in a contained area, adding personality and style to your home without overwhelming larger living spaces.
Incorporating vibrant designs through wallpapered kitchen cabinets, unifying rooms with cohesive color schemes, and using bold wallpaper in powder rooms are just a few ways ‘My Home Twitza’ can help transform your living space. These color and pattern experiments not only add visual interest but also create a personalized and dynamic home environment.
As we’ve explored the exciting possibilities of color and pattern in your home, it’s important to consider how these design choices can complement and enhance the functionality of your living spaces. With this in mind, next, we’ll see how to create functional and stylish nooks that not only look great but also serve practical purposes in your daily life.
Create Functional and Stylish Nooks
Now that we have explored how to experiment with color and pattern in your home, let’s dive into creating functional and stylish nooks that can transform your living space overnight. These cozy corners not only add character to your home but also serve practical purposes, making them essential elements in the ‘My Home Twitza’ transformation.
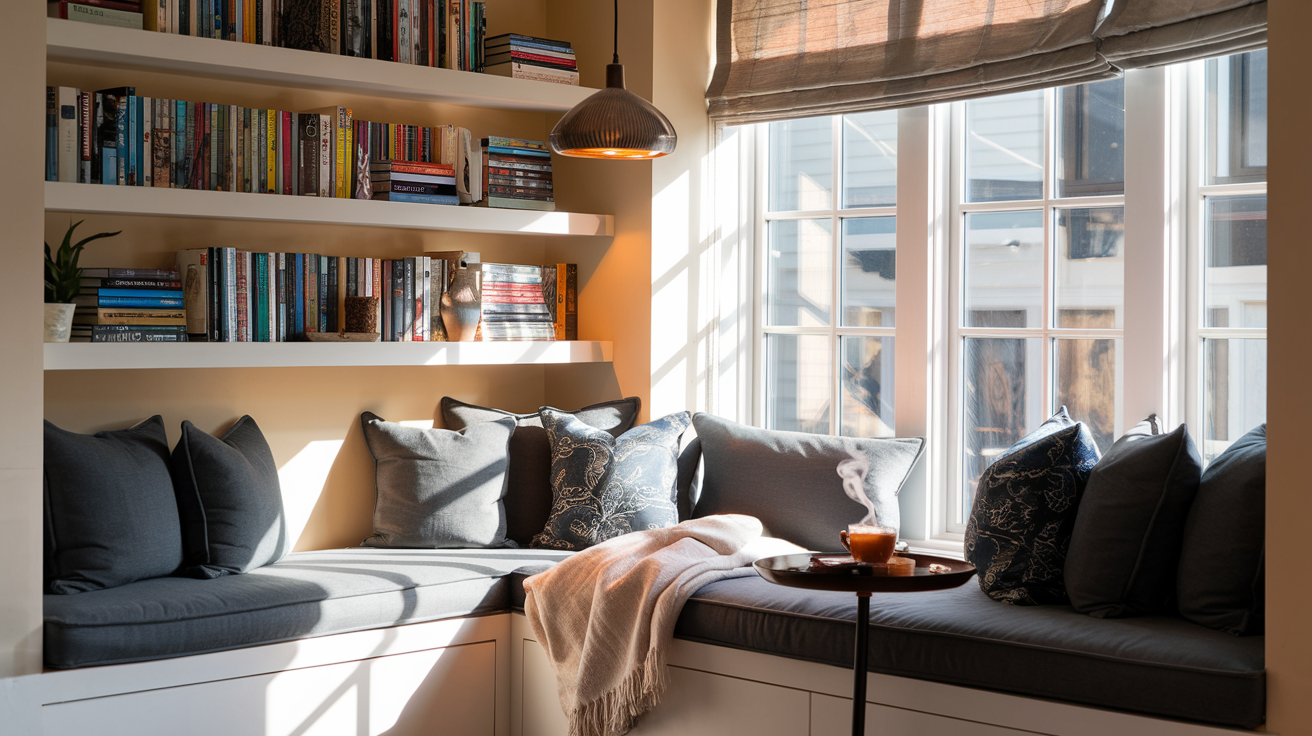
A. Design inviting reading corners with curated decor
Creating a perfect reading nook is an art that combines comfort, style, and functionality. Drawing inspiration from the reference content, we can explore various approaches to designing these inviting corners.
- Embrace Minimalism:
Taking cues from Donald Judd’s minimalist aesthetics, consider creating a reading corner that focuses on clean lines and simplicity. This approach can help create a serene atmosphere conducive to reading and relaxation.
- Choose a comfortable, streamlined armchair
- Add a sleek floor lamp for focused lighting
- Install floating shelves for a clutter-free book display
- Incorporate Mid-Century Modern Elements:
The “Atlas of Midcentury Houses” showcases the enduring appeal of mid-century modern design. Infuse your reading nook with elements from this iconic style:
- Select a classic Eames lounge chair
- Add a Saarinen side table for books and beverages
- Hang a George Nelson bubble lamp for ambient lighting
- Blend Modern and Antique:
Drawing inspiration from Rose Uniacke’s design philosophy, create a reading corner that harmoniously combines modern and antique elements:
- Choose a contemporary reading chair
- Pair it with an antique side table
- Add a vintage floor lamp for character
- Curate a Personal Library:
Taking a cue from “The English Country House,” create a reading nook that reflects a rich history of British interiors:
- Install floor-to-ceiling bookshelves
- Add a leather wingback chair for a classic touch
- Include a traditional reading lamp with a green glass shade
- Embrace Scandinavian Design:
Inspired by Niki Brantmark’s “The Scandinavian Home,” create a reading nook that utilizes natural light and materials:
- Position the nook near a window for ample natural light
- Choose a light-colored, comfortable chair
- Add sheepskin throws for warmth and texture
- Incorporate wooden elements like a small side table or bookshelf
- Create a Colorful Retreat:
Drawing from Miles Redd’s “The Big Book of Chic,” design a reading nook that’s bold and vibrant:
- Choose a statement armchair in a bright, eye-catching color
- Add complementary throw pillows and a cozy blanket
- Install a colorful pendant light for a touch of drama
- Design a Multifunctional Space:
Inspired by Joanna Gaines’ “Homebody,” create a reading nook that serves multiple purposes:
- Choose a daybed that can double as seating and a guest bed
- Add storage ottomans for books and blankets
- Install a wall-mounted desk that can fold away when not in use
To enhance the functionality and style of your reading nook, consider the following accessories:
| Accessory | Function | Style Element |
|---|---|---|
| Task Lamp | Focused lighting for reading | Modern or vintage design |
| Bookends | Organize and display books | Decorative statement pieces |
| Throw Pillows | Added comfort | Color and texture accents |
| Area Rug | Defines the space | Pattern and warmth |
| Wall Art | Personalizes the nook | Reflects reading interests |
| Plant Stand | Brings nature indoors | Adds life and color |
By carefully curating these elements, you can create a reading nook that not only serves its primary function but also becomes a stylish focal point in your home.
B. Transform mudrooms with eye-catching prints
Mudrooms are often overlooked spaces in home design, but they present a unique opportunity to make a statement while serving a practical purpose. Let’s explore how to transform these functional areas into eye-catching spaces using prints and patterns.
- Wallpaper Wonder:
Taking inspiration from “Living With Pattern” by Rebecca Atwood, consider using bold wallpaper to transform your mudroom:
- Choose a large-scale floral or geometric print
- Opt for wipeable or vinyl wallpaper for easy maintenance
- Coordinate accessories and storage solutions with colors from the wallpaper
- Gallery Wall of Prints:
Drawing from the eclectic approach of Kelly Wearstler in “Evocative Style,” create a gallery wall of framed prints:
- Mix and match different sizes and styles of frames
- Include a variety of art prints, photographs, and even children’s artwork
- Use a cohesive color scheme to tie the collection together
- Patterned Tile Floor:
Inspired by the rich interiors featured in “Interiors: Greatest Rooms of the 20th Century,” consider a bold tile floor:
- Choose encaustic tiles with intricate patterns
- Opt for a black and white design for a classic look
- Or select colorful Moroccan-inspired tiles for a bohemian vibe
- Stenciled Accent Wall:
Taking a cue from DIY projects in “The Maker” by Tamara Maynes, create a custom stenciled wall:
- Choose a geometric or nature-inspired stencil design
- Use contrasting paint colors for maximum impact
- Apply the stencil to one accent wall or the entire mudroom
- Fabric-Covered Storage:
Inspired by the organizational strategies in “The Home Edit,” incorporate patterned fabric into your storage solutions:
- Cover storage boxes with bold printed fabric
- Use patterned liners for woven baskets
- Add cushions with eye-catching prints to built-in benches
- Botanical Prints Display:
Drawing from the nature-inspired approach in Lauren Liess’ “Habitat: The Field Guide to Decorating,” create a display of botanical prints:
- Frame a collection of vintage botanical illustrations
- Arrange them in a grid or organic cluster
- Complement with real plants or dried botanicals
- Striped or Chevron Painted Wall:
Inspired by the bold design choices in “Farrow & Ball: How to Decorate,” consider painting stripes or chevron patterns:
- Use painter’s tape to create crisp lines
- Choose complementary colors for a striking effect
- Consider an ombre effect for a modern twist
To enhance the functionality of your mudroom while incorporating eye-catching prints, consider the following elements:
| Element | Function | Print/Pattern Idea |
|---|---|---|
| Bench | Seating for putting on shoes | Upholster in a bold geometric fabric |
| Coat Hooks | Hanging outerwear | Choose decorative hooks with patterned backplates |
| Umbrella Stand | Storing umbrellas | Select a stand with a printed design |
| Door Mat | Wiping feet | Opt for a patterned, durable indoor/outdoor rug |
| Storage Cubbies | Organizing shoes and accessories | Line the backs with patterned contact paper |
| Window Treatment | Privacy and light control | Choose curtains or Roman shades in a complementary print |
By incorporating these eye-catching prints and patterns, you can transform your mudroom from a purely functional space into a stylish entry point for your home.
C. Style library dining rooms with books for added character
The concept of a library dining room combines the warmth of a traditional library with the functionality of a dining space. This unique approach adds character and depth to your home, creating a multifunctional area that’s perfect for both intimate dinners and quiet reading sessions. Let’s explore how to style these spaces effectively, drawing inspiration from our reference content.
- Floor-to-Ceiling Bookshelves:
Inspired by Thomas O’Brien’s “Library House,” create a dramatic backdrop with floor-to-ceiling bookshelves:
- Install custom-built shelving around the dining area
- Leave space for a sideboard or buffet for dining essentials
- Consider a rolling ladder for accessing higher shelves
- Color-Coded Book Arrangement:
Taking a cue from the organizational strategies in “The Home Edit Life,” arrange books by color:
- Create a rainbow effect across the shelves
- Use this as an opportunity to introduce pops of color into the room
- Intersperse decorative objects among the books for visual interest
- Blend of Modern and Antique:
Drawing from Rose Uniacke’s design philosophy, combine modern dining furniture with antique books and accessories:
- Choose a sleek, modern dining table and chairs
- Surround it with vintage bookshelves or antique cabinets filled with books
- Add antique table lamps or a vintage chandelier for ambient lighting
- Curated Book Collections:
Inspired by “The English Country House,” display curated collections of books:
- Group books by topic or era
- Create vignettes with related objects (e.g., globes with travel books)
- Use bookends as decorative elements
- Incorporate Reading Nooks:
Taking inspiration from Joanna Gaines’ “Homebody,” integrate cozy reading areas within the dining space:
- Place a comfortable armchair in a corner
- Add a floor lamp for focused reading light
- Include a small side table for drinks and current reads
- Open Shelving and Book Displays:
Drawing from the minimalist approach in “Remodelista” by Julie Carlson, use open shelving to display books:
- Install floating shelves above a sideboard or buffet
- Alternate horizontal and vertical book stacking for visual interest
- Leave some negative space for a clean, uncluttered look
- Books as Decor:
Inspired by Bunny Williams’ “Scrapbook for Living,” use books as decorative elements:
- Create centerpieces with stacks of books and fresh flowers
- Use oversized art books as bases for table lamps
- Display books with beautiful spines or covers face-out
To enhance the functionality and style of your library dining room, consider the following elements:
| Element | Function | Book-Inspired Idea |
|---|---|---|
| Dining Table | Central eating area | Use vintage library table as dining table |
| Lighting | Ambient and task lighting | Incorporate classic library table lamps |
| Wall Decor | Visual interest | Frame vintage book pages or covers as art |
| Table Linens | Protection and style | Choose book-themed placemats or runners |
| Seating | Comfortable dining chairs | Use leather armchairs reminiscent of library seating |
| Storage | Keeping dining essentials | Repurpose a vintage card catalog for cutlery storage |
By thoughtfully incorporating these elements, you can create a library dining room that seamlessly blends the love of books with the joy of dining, adding unique character to your home.
Additional Tips for Styling Library Dining Rooms:
- Thematic Approach:
Consider organizing your books and decor around a specific theme or era:
- Create a vintage travel-inspired space with old maps, globes, and travel literature
- Design a literary salon atmosphere with first editions and author portraits
- Develop a culinary library with cookbooks and food-related literature
- Layered Lighting:
Ensure proper lighting for both dining and reading:
- Install dimmable overhead lighting for overall illumination
- Add wall sconces near bookshelves for browsing
- Include table lamps on sideboards for ambient lighting
- Flexible Furniture:
Choose furniture that can adapt to different uses:
- Select an expandable dining table for larger gatherings
- Use dining chairs that are comfortable enough for extended reading
- Incorporate a rolling bar cart that can double as a book trolley
- Interactive Elements:
Encourage engagement with the books in the space:
- Leave a guestbook for visitors to recommend their favorite reads
- Create a “Book of the Month” display to highlight different volumes
- Include a small writing desk for note-taking or journaling
- Seasonal Rotations:
Keep the space fresh by rotating book displays:
- Highlight holiday-themed books during festive seasons
- Feature books about gardening and nature in spring and summer
- Showcase cozy, wintertime reads during colder months
- Incorporate Technology:
Blend traditional books with modern technology:
- Include a charging station for e-readers
- Install smart lighting that can be adjusted for reading or dining
- Consider a digital frame for displaying book quotes or cover art
- Preservation Considerations:
Protect your books while keeping them accessible:
- Use UV-filtering window treatments to prevent sun damage
- Invest in proper bookends to keep volumes upright
- Consider glass-fronted cabinets for rare or valuable books
By implementing these ideas, you can create a library dining room that not only serves as a functional eating space but also celebrates the beauty and knowledge contained within books. This unique approach to interior design adds depth, character, and intellectual stimulation to your home, making it a true reflection of your interests and personality.
As we transition from creating these functional and stylish nooks, we can see how they contribute to the overall aesthetic of your home. In the next section, we’ll explore how to elevate your home’s aesthetic with architectural elements, building upon the character and charm we’ve established in these carefully curated spaces.
Elevate Your Home’s Aesthetic with Architectural Elements
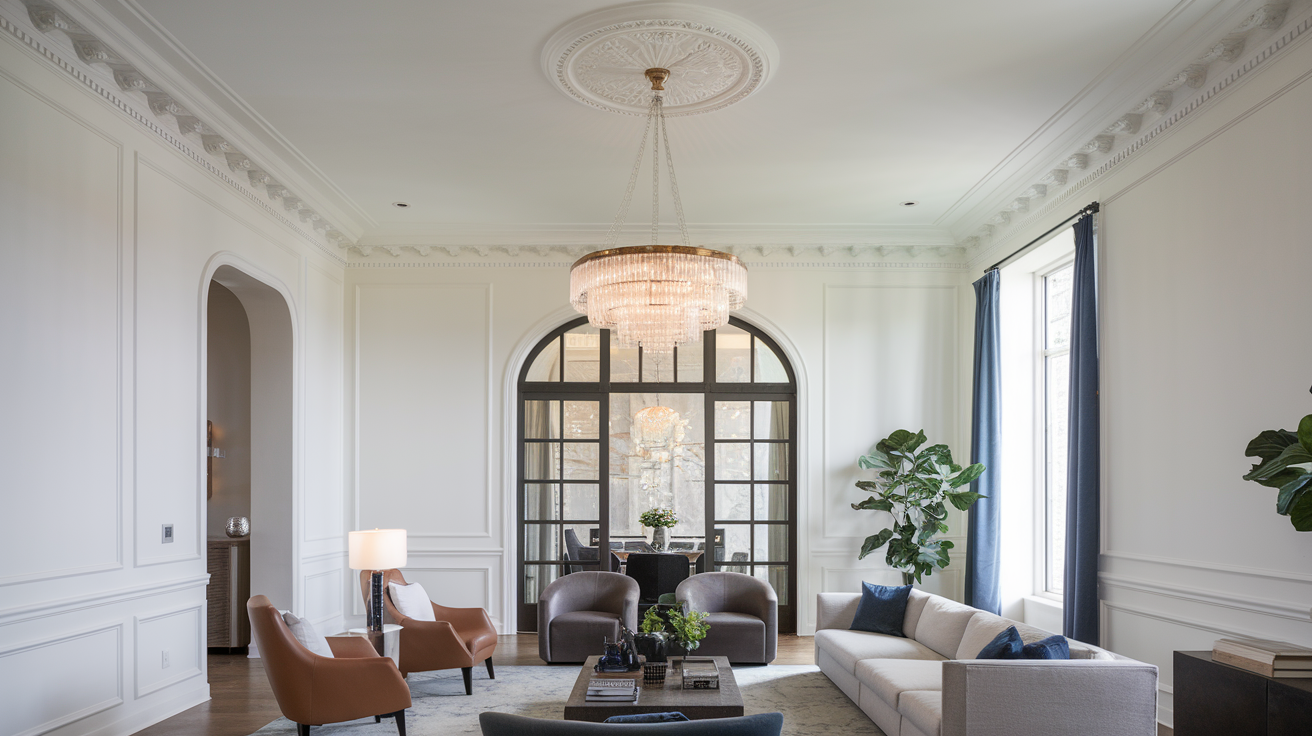
Now that we’ve explored how to create functional and stylish nooks in your home, let’s elevate your living space even further by incorporating architectural elements that will transform your home’s aesthetic. ‘My Home Twitza’ offers innovative solutions to enhance your home’s visual appeal and create a more sophisticated atmosphere.
Experiment with wainscotting for a stylish touch
Wainscotting is a classic architectural feature that can add depth, texture, and elegance to any room. This technique involves applying decorative paneling to the lower portion of walls, creating a visually striking contrast with the upper part. Here’s how you can incorporate wainscotting to elevate your home’s aesthetic:
- Choose the right style: Wainscotting comes in various styles, including:
- Board and batten
- Raised panel
- Flat panel
- Beadboard
Select a style that complements your home’s overall design and the specific room’s purpose.
Determine the height: Traditionally, wainscotting covers the bottom third of the wall, but you can adjust this based on your preferences and the room’s dimensions. Consider these options:
- Standard height: 32-36 inches
- Chair rail height: 28-32 inches
- Tall wainscotting: 54-72 inches (for rooms with high ceilings)
Select materials: Choose from a range of materials to achieve your desired look:
- Wood (pine, oak, or MDF)
- PVC (for moisture-prone areas)
- Tile (for a unique, durable option)
Add visual interest: Enhance your wainscotting with these design elements:
- Paint contrast: Use a different color for the wainscotting and the upper wall
- Textured wallpaper: Apply wallpaper above the wainscotting for added depth
- Decorative molding: Incorporate intricate molding patterns for a luxurious touch
Consider room-specific applications:
- Living room: Use tall wainscotting to create a formal atmosphere
- Dining room: Opt for raised panel wainscotting for a traditional look
- Bathroom: Choose beadboard or PVC wainscotting for moisture resistance
- Hallway: Install chair rail-height wainscotting to protect walls from scuffs
Wainscotting not only adds visual appeal but also serves practical purposes. It can protect walls from damage, hide imperfections, and even improve insulation. When properly installed, wainscotting can significantly increase your home’s value and create a more polished appearance.
To maximize the impact of your wainscotting, consider these additional tips:
- Extend wainscotting around corners for a cohesive look
- Use wainscotting to define separate areas in open-concept spaces
- Incorporate hidden storage behind wainscotting panels for added functionality
- Experiment with different finishes, such as distressed or glossy, to achieve your desired aesthetic
By thoughtfully incorporating wainscotting into your home, you can create a more sophisticated and visually appealing living space that reflects your personal style and enhances the overall architecture of your home.
Install plate racks in kitchens for both function and charm
Plate racks are a versatile and charming addition to any kitchen, offering both practical storage solutions and aesthetic appeal. ‘My Home Twitza’ recognizes the potential of this architectural element to transform your kitchen space. Here’s how you can incorporate plate racks to elevate your kitchen’s design and functionality:
Choose the right style: Plate racks come in various styles to suit different kitchen aesthetics:
- Open shelving: Creates an airy, modern look
- Cabinet-integrated: Offers a seamless, built-in appearance
- Freestanding: Provides flexibility and a rustic charm
- Wall-mounted: Maximizes vertical space and adds visual interest
Select appropriate materials: Choose materials that complement your kitchen’s design:
- Wood: For a warm, traditional look (oak, pine, or cherry)
- Metal: For an industrial or contemporary feel (stainless steel or wrought iron)
- Glass: For a sleek, modern aesthetic
- Combination: Mix materials for a unique, custom look
Consider placement options:
- Above countertops: Easy access for everyday use
- Over sinks: Convenient for dish drying and storage
- On empty wall spaces: Utilize unused areas effectively
- Inside cabinets: For a hidden storage solution
- As part of an island: Create a focal point in the kitchen
Incorporate additional features:
- Adjustable shelves: For versatility in storing different sized items
- Integrated lighting: To highlight displayed items and improve functionality
- Combination storage: Include drawers or hooks for utensils and linens
- Decorative molding: Add architectural interest to the plate rack design
Maximize functionality:
- Use plate racks to store and display:
- Everyday dishes
- Special occasion china
- Serving platters
- Cookbooks
- Decorative items (vases, bowls, etc.)
- Use plate racks to store and display:
Enhance visual appeal:
- Create a color scheme: Coordinate plate colors with your kitchen’s palette
- Mix and match: Combine different plate styles for an eclectic look
- Incorporate seasonal displays: Rotate dishes to reflect holidays or seasons
- Use as a focal point: Display unique or artistic plates as kitchen decor
To help you choose the right plate rack style for your kitchen, consider this comparison table:
| Style | Pros | Cons | Best for |
|---|---|---|---|
| Open shelving | Airy look, easy access | Requires regular dusting | Modern, minimalist kitchens |
| Cabinet-integrated | Seamless appearance, protected storage | Less flexibility, more expensive | Traditional, built-in designs |
| Freestanding | Versatile, movable | Takes up floor space | Rustic, farmhouse-style kitchens |
| Wall-mounted | Space-saving, customizable | Requires wall installation | Small kitchens, accent pieces |
When installing plate racks, keep these additional tips in mind:
- Ensure proper weight distribution and secure mounting for safety
- Consider the height of your ceilings and the reach of family members when deciding on placement
- Use plate racks to break up monotonous wall spaces or large cabinet expanses
- Incorporate plate racks into your kitchen’s workflow for efficient meal preparation and cleanup
By thoughtfully integrating plate racks into your kitchen design, you can create a functional and charming space that reflects your personal style and enhances your home’s overall aesthetic. Plate racks offer a unique opportunity to showcase your favorite dishes while adding architectural interest to your kitchen.
Enhance radiator appeal with creative shelving solutions
Radiators are often seen as necessary but unattractive elements in a home. However, with creative shelving solutions, you can transform these functional units into stylish architectural features. ‘My Home Twitza’ offers innovative ideas to enhance your radiator’s appeal while maximizing space and adding visual interest to your rooms.
Choose the right shelving style:
- Floating shelves: Create a sleek, modern look
- Ladder-style shelves: Add a rustic or industrial touch
- Built-in cabinets: Offer a seamless, integrated appearance
- Open-frame shelving: Provide an airy, minimalist feel
Select appropriate materials:
- Wood: For warmth and versatility (oak, pine, or reclaimed wood)
- Metal: For a contemporary or industrial look (steel or wrought iron)
- Glass: For a light, modern aesthetic
- Composite materials: For durability and moisture resistance
Consider placement options:
- Above the radiator: Utilize vertical space without blocking heat
- Surrounding the radiator: Create a frame or built-in look
- Extending from the radiator: Incorporate the radiator into a larger shelving unit
- Removable shelves: Allow for easy access to the radiator when needed
Incorporate additional features:
- Adjustable shelves: For flexibility in storing different sized items
- Integrated lighting: To highlight displayed items and improve ambiance
- Decorative panels: To conceal the radiator when not in use
- Combination storage: Include drawers or cabinets for hidden storage
Maximize functionality:
- Use radiator shelving to store and display:
- Books and magazines
- Decorative objects (vases, sculptures, etc.)
- Plants (heat-tolerant varieties)
- Family photos and artwork
- Everyday items (in entryways or bathrooms)
- Use radiator shelving to store and display:
Enhance visual appeal:
- Create a cohesive design: Match shelving to existing room decor
- Use contrasting colors: Make the shelving a focal point
- Incorporate texture: Add interest with textured materials or finishes
- Layer items: Create depth by arranging objects at different heights
To help you choose the right radiator shelving solution for your space, consider this comparison table:
| Shelving Style | Pros | Cons | Best for |
|---|---|---|---|
| Floating shelves | Clean look, easy installation | Limited weight capacity | Modern, minimalist spaces |
| Ladder-style | Versatile, movable | May not fit all radiator sizes | Rustic, industrial interiors |
| Built-in cabinets | Seamless appearance, extra storage | More expensive, permanent | Traditional homes, larger rooms |
| Open-frame | Airy feel, allows heat circulation | Less concealment of radiator | Contemporary spaces, smaller rooms |
When enhancing your radiator with shelving, keep these additional tips in mind:
- Ensure proper ventilation: Leave space between the radiator and shelving to allow heat to circulate effectively
- Consider heat-resistant materials: Choose materials that can withstand the warmth emitted by the radiator
- Balance form and function: Design shelving that complements your decor while maintaining easy access to radiator controls
- Use radiator covers: Incorporate decorative covers as part of your shelving design for added visual appeal
Here are some creative ideas to further enhance your radiator shelving:
- Window seat: Transform a radiator under a window into a cozy seating area with built-in storage.
- Entryway organization: Use radiator shelving in the foyer to create a functional drop zone for keys, mail, and other essentials.
- Plant display: Create a mini greenhouse effect by using the radiator’s warmth to nurture heat-loving plants on specially designed shelves.
- Home office nook: Incorporate a small desk or workspace above a radiator to maximize space in compact rooms.
- Bar area: Design a stylish bar or coffee station using radiator shelving in dining rooms or kitchens.
By implementing these creative shelving solutions, you can transform your radiators from eyesores into attractive architectural elements that enhance your home’s overall aesthetic. These designs not only improve the visual appeal of your space but also add functionality and maximize the use of often-overlooked areas in your home.
When incorporating these architectural elements – wainscotting, plate racks, and radiator shelving – consider how they work together to create a cohesive design throughout your home. For example:
- Use consistent materials or finishes across different elements to create a unified look
- Align the heights of wainscotting and radiator shelving for a balanced appearance
- Incorporate similar decorative details or moldings in both wainscotting and plate rack designs
By thoughtfully integrating these architectural features, you can create a sophisticated and visually appealing living space that reflects your personal style and enhances the overall architecture of your home.
To further elevate your home’s aesthetic with architectural elements, consider these additional ideas:
Ceiling treatments:
- Coffered ceilings: Add depth and visual interest to large rooms
- Tray ceilings: Create the illusion of height in bedrooms or dining areas
- Beamed ceilings: Bring rustic charm or industrial flair to living spaces
Archways and columns:
- Interior arches: Define separate areas in open-concept layouts
- Decorative columns: Add structural interest and elegance to rooms
- Pillars: Create a grand entrance or divide larger spaces
Trim and molding:
- Crown molding: Enhance the transition between walls and ceilings
- Picture rail molding: Add character and create a gallery-like display
- Baseboards: Provide a finished look and protect walls from scuffs
Built-in features:
- Window seats: Maximize space and create cozy reading nooks
- Bookcases: Incorporate floor-to-ceiling shelving for a library feel
- Fireplaces: Add a focal point with a custom mantel and surround
Staircases:
- Upgraded balusters: Replace basic spindles with decorative options
- Refinished treads: Add visual interest with contrasting wood stains
- Under-stair storage: Utilize often-wasted space with custom cabinets
Doors and windows:
- Transom windows: Increase natural light and add architectural detail
- French doors: Create an elegant transition between indoor and outdoor spaces
- Unique door designs: Install statement doors for added visual impact
Lighting fixtures:
- Chandeliers: Make a bold statement in entryways or dining rooms
- Sconces: Add ambient lighting and decorative touches to hallways
- Pendant lights: Create focal points over kitchen islands or in reading nooks
When incorporating these architectural elements, consider the following principles to ensure a cohesive and visually appealing design:
- Scale and proportion: Ensure that the size of architectural elements is appropriate for the room’s dimensions.
- Balance: Distribute visual weight evenly throughout the space to create a harmonious look.
- Rhythm: Repeat design elements to create a sense of continuity and flow.
- Contrast: Use contrasting materials, colors, or textures to add visual interest and depth.
- Functionality: Ensure that architectural elements serve both aesthetic and practical purposes.
By carefully selecting and integrating these architectural features, you can transform your living space into a sophisticated and personalized home that reflects your unique style and enhances your daily living experience.
As we conclude this section on elevating your home’s aesthetic with architectural elements, it’s important to remember that these changes can have a significant impact on the overall look and feel of your space. The key is to choose elements that complement your existing decor and lifestyle while adding visual interest and functionality.
Now that we’ve explored various ways to enhance your home’s architecture, you might be inspired to take on some DIY projects to further personalize your space. In the next section, we’ll dive into creative and budget-friendly DIY ideas that will allow you to put your personal stamp on your home decor. From custom artwork to upcycled furniture, these projects will help you create a truly unique living environment that reflects your personality and style.
Personalize Your Space with DIY Projects
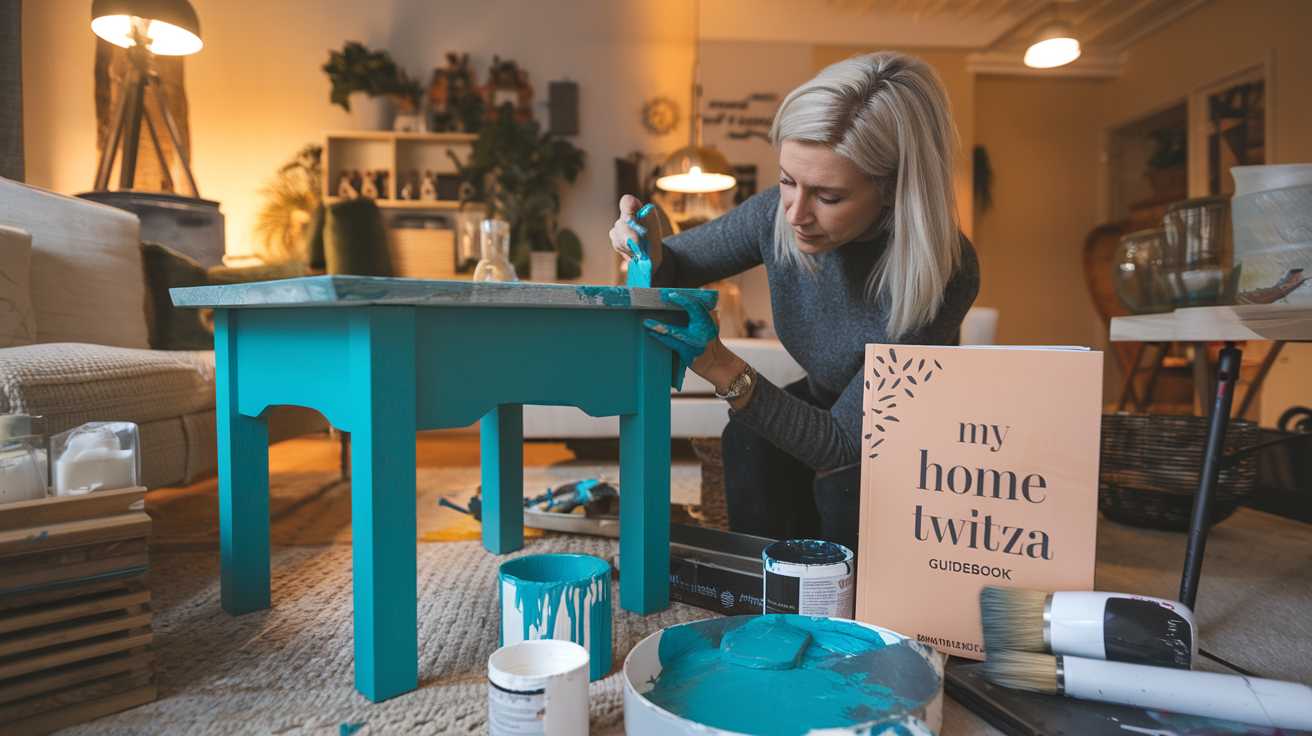
Now that we’ve explored how to elevate your home’s aesthetic with architectural elements, let’s dive into the world of personalization through DIY projects. My Home Twitza offers a wealth of opportunities to infuse your living space with unique charm and creativity.
A. Paint thrifted silver tea sets for unique decor
Transforming thrifted silver tea sets into stunning decor pieces is a creative way to add a touch of elegance and personality to your home. This DIY project not only allows you to upcycle vintage items but also creates conversation starters that reflect your individual style.
To begin, scour local thrift stores, flea markets, or online marketplaces for silver tea sets. Look for pieces with interesting shapes and details, even if they’re tarnished or slightly damaged. Once you’ve collected your treasures, follow these steps to give them a new lease on life:
- Clean the tea sets thoroughly using a gentle soap and warm water.
- Sand the surface lightly to create a better surface for paint adhesion.
- Apply a primer designed for metal surfaces.
- Choose your paint colors – consider bold hues or metallic shades for a modern twist.
- Apply several thin coats of paint, allowing each layer to dry completely.
- Seal the painted surface with a clear protective coat for durability.
Here’s a table showcasing some creative color combinations and their potential uses:
| Paint Color | Finish | Potential Use |
|---|---|---|
| Matte Black | Flat | Modern centerpiece |
| Rose Gold | Metallic | Glamorous vanity accessory |
| Navy Blue | Satin | Coastal-inspired bookshelf decor |
| Emerald Green | Gloss | Eclectic coffee table accent |
| Antique White | Chalk | Shabby chic kitchen display |
Once your painted tea sets are complete, consider these innovative ways to incorporate them into your decor:
- Use teapots as unique vases for fresh or dried flowers
- Transform sugar bowls into stylish succulent planters
- Repurpose creamers as decorative pen holders for your desk
- Display teacups and saucers as wall art by mounting them on decorative plates
- Create a whimsical tiered stand using various pieces from the set
By painting thrifted silver tea sets, you’re not only adding a personal touch to your home but also participating in sustainable decor practices. This project aligns perfectly with My Home Twitza’s philosophy of transforming living spaces with creativity and resourcefulness.
B. Craft homemade scones for a welcoming atmosphere
While My Home Twitza primarily focuses on home decor and DIY projects, creating a welcoming atmosphere extends beyond visual elements. Crafting homemade scones can fill your home with delightful aromas and provide a warm, inviting touch for guests or family members.
To incorporate this idea into your home transformation, consider setting up a dedicated baking nook in your kitchen. Here’s how you can create a functional and stylish space for your scone-making endeavors:
- Designate a countertop area for baking preparations.
- Install open shelving above the workspace to store ingredients and baking tools.
- Use decorative canisters or glass jars to organize dry ingredients like flour, sugar, and baking powder.
- Hang a pegboard to display measuring cups, spoons, and other utensils.
- Add a small bookshelf or recipe holder for your favorite scone recipes.
Now, let’s explore a simple yet delicious scone recipe that you can use to create a welcoming atmosphere in your home:
Classic British Scones Recipe
Ingredients:
- 2 cups all-purpose flour
- 1/4 cup granulated sugar
- 1 tablespoon baking powder
- 1/2 teaspoon salt
- 6 tablespoons cold unsalted butter, cubed
- 2/3 cup cold milk
- 1 large egg
- 1 teaspoon vanilla extract
- Optional: 1/2 cup dried fruit (raisins, currants, or cranberries)
Instructions:
- Preheat your oven to 425°F (220°C) and line a baking sheet with parchment paper.
- In a large bowl, whisk together flour, sugar, baking powder, and salt.
- Cut in the cold butter using a pastry cutter or your fingers until the mixture resembles coarse crumbs.
- In a separate bowl, whisk together milk, egg, and vanilla extract.
- Pour the wet ingredients into the dry ingredients and mix until just combined.
- If using, fold in the dried fruit.
- Turn the dough out onto a lightly floured surface and pat it into a 1-inch thick circle.
- Use a 2.5-inch round cutter to cut out scones, placing them on the prepared baking sheet.
- Brush the tops of the scones with a little milk for a golden finish.
- Bake for 12-15 minutes or until golden brown.
To enhance the welcoming atmosphere created by your homemade scones, consider these presentation ideas:
- Serve scones on a rustic wooden board or a vintage cake stand
- Use mismatched teacups and saucers for an eclectic, charming look
- Display jams and clotted cream in small, decorative bowls
- Create a cozy seating area near your baking nook with comfortable chairs and soft throw pillows
By incorporating this baking project into your home transformation, you’re not only adding a personal touch but also creating lasting memories and traditions. The aroma of freshly baked scones will undoubtedly contribute to the warm and inviting atmosphere that My Home Twitza aims to achieve.
C. Maintain a gratitude journal for improved mental well-being
While My Home Twitza primarily focuses on physical transformations of living spaces, it’s essential to recognize that a truly welcoming home also nurtures mental and emotional well-being. Maintaining a gratitude journal is a simple yet powerful way to improve your mental state and create a positive atmosphere in your home.
To incorporate this practice into your daily routine, consider creating a dedicated journaling nook. Here’s how you can design a space that encourages reflection and gratitude:
- Choose a quiet corner of your home, perhaps near a window with natural light.
- Place a small writing desk or a comfortable armchair with a side table.
- Add a soft, warm lamp for evening journaling sessions.
- Incorporate plants or flowers to bring a touch of nature to your space.
- Display inspiring quotes or artwork that remind you to practice gratitude.
Now, let’s explore how to start and maintain a gratitude journal:
Getting Started with Your Gratitude Journal
Choose your journal: Select a notebook that resonates with you. It could be a simple lined journal or a more elaborate, decorative one.
Set a schedule: Decide when you’ll write in your journal. Many people prefer to write in the morning or before bed, but choose a time that works best for you.
Start small: Begin by writing three things you’re grateful for each day. As you become more comfortable with the practice, you can expand your entries.
Be specific: Instead of general statements, focus on specific moments or experiences. For example, instead of “I’m grateful for my family,” you might write, “I’m grateful for the supportive phone call I had with my sister today.”
Include sensory details: Describe how the things you’re grateful for look, sound, smell, taste, or feel. This helps to make your entries more vivid and meaningful.
Reflect on challenges: Sometimes, finding gratitude in difficult situations can be the most powerful practice. Try to find silver linings or lessons learned from challenging experiences.
Use prompts: If you’re struggling to come up with ideas, use prompts to inspire your writing. Here’s a table with some example prompts:
| Category | Prompt |
|---|---|
| Relationships | Who made you smile today and why? |
| Personal Growth | What’s something you’ve learned recently? |
| Nature | What’s a natural beauty you observed today? |
| Home | What’s your favorite spot in your house and why? |
| Health | What’s one thing your body did for you today? |
| Work/School | What’s an accomplishment you’re proud of this week? |
| Random Acts of Kindness | What’s a kind gesture someone did for you recently? |
- Review periodically: Take time to read through your past entries. This can help boost your mood and remind you of the positive aspects of your life.
To further enhance your gratitude practice and integrate it into your home decor, consider these ideas:
- Create a gratitude wall using a large cork board or magnetic paint. Write down things you’re grateful for on colorful notes and display them.
- Make a gratitude jar. Write down moments of gratitude on small slips of paper throughout the year and read them all on New Year’s Eve.
- Design and frame your own gratitude-themed artwork or calligraphy to display in your journaling nook.
- Use decorative washi tape or stickers to embellish your journal entries, making the practice more visually appealing and enjoyable.
By maintaining a gratitude journal, you’re not only improving your mental well-being but also creating a positive energy that permeates your entire living space. This practice aligns with My Home Twitza’s goal of transforming your home into a sanctuary that nurtures both body and mind.
As we’ve explored these personalized DIY projects, from painting thrifted tea sets to crafting homemade scones and maintaining a gratitude journal, we’ve seen how small, intentional changes can significantly impact your living space. These projects not only add unique touches to your home but also create a warm, welcoming atmosphere that reflects your personality and values.
With this foundation of personalization in place, we’re now ready to explore how to embrace seasonal decor for year-round charm. This next section will build upon the DIY skills and creativity we’ve cultivated, showing you how to adapt your newly personalized space to the changing seasons, ensuring your home remains fresh, inviting, and in harmony with the world outside your doors.
Embrace Seasonal Decor for Year-Round Charm
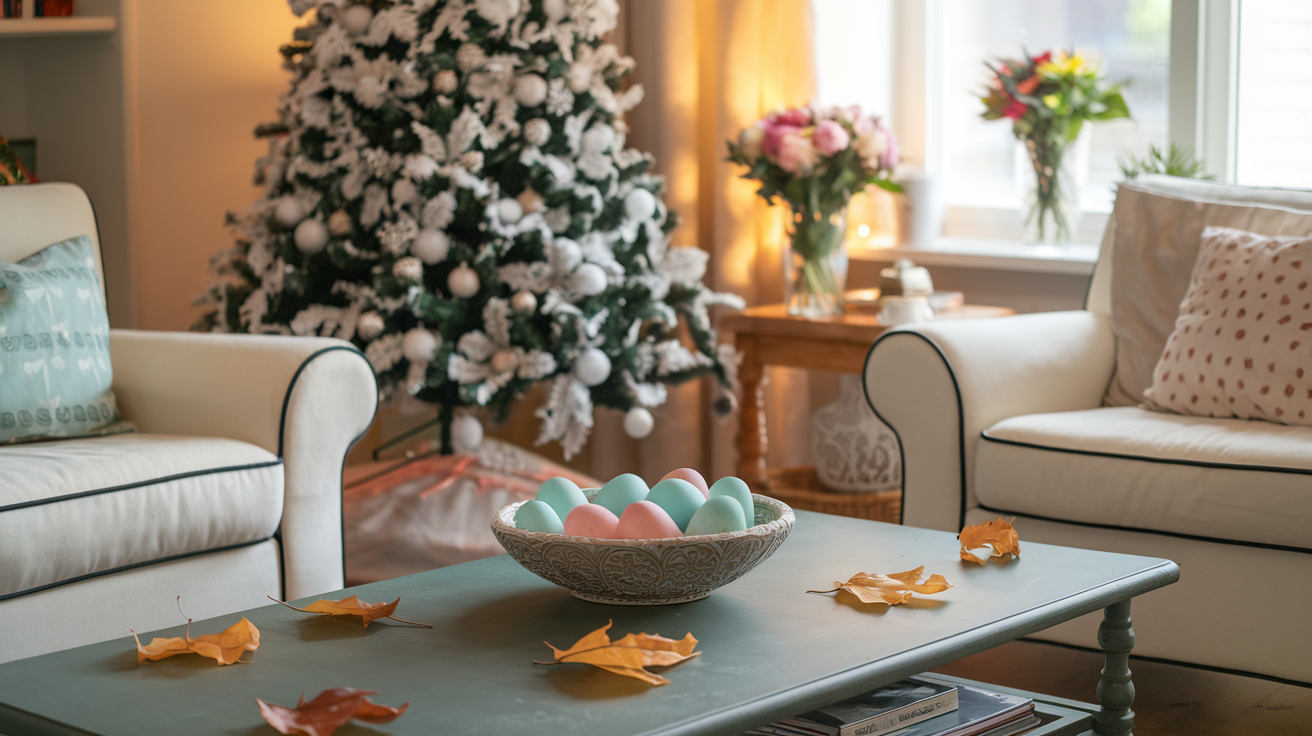
Now that we’ve explored how to personalize your space with DIY projects, let’s shift our focus to embracing seasonal decor for year-round charm. This approach allows you to continually refresh your living space, creating a home that evolves with the changing seasons and keeps your environment feeling fresh and inviting.
A. Incorporate “grandmacore” elements for autumn coziness
As we transition from the DIY spirit of personalization to the cozy embrace of autumn, the “grandmacore” aesthetic offers a perfect blend of nostalgia and comfort. This trend, which draws inspiration from the warm and inviting atmosphere of a grandmother’s home, is particularly well-suited for the fall season.
To incorporate “grandmacore” elements into your autumn decor:
Embrace earthy tones: Opt for warm, rich colors like deep oranges, rustic reds, and golden browns. These hues evoke the changing leaves and create a cozy atmosphere reminiscent of autumn afternoons spent at grandma’s house.
Layer textures: Introduce plush throw blankets, knitted pillows, and soft area rugs. These textural elements not only add warmth but also create a sense of comfort and nostalgia.
Display vintage items: Showcase heirloom pieces or vintage-inspired decor. This could include:
- Antique picture frames
- Vintage clocks
- Old-fashioned tea sets
- Retro kitchen appliances
Incorporate natural elements: Bring the outdoors in with:
- Dried flower arrangements
- Pinecone displays
- Gourds and pumpkins
- Branches with autumn leaves
Use traditional patterns: Opt for classic patterns like plaid, floral prints, or crocheted doilies to add a touch of old-world charm.
Creating a Cozy Autumn Corner
To truly capture the essence of “grandmacore” in your autumn decor, consider creating a dedicated cozy corner in your living space. Here’s a step-by-step guide:
- Choose a quiet nook or corner of a room
- Place a comfortable armchair or rocking chair
- Add a side table for books and a warm beverage
- Drape a handmade quilt or chunky knit blanket over the chair
- Place a soft cushion with a vintage-inspired print
- Set up a floor lamp with a warm-toned bulb for ambient lighting
- Arrange a small bookshelf nearby with classic novels and family photo albums
- Include a woven basket filled with yarn and knitting needles
- Hang a vintage wall clock or framed needlepoint art above
- Place a braided rug underfoot for added warmth and texture
By incorporating these elements, you’ll create a space that not only embraces the autumn season but also evokes the comforting memories of visits to grandma’s house.
B. Adapt decor to reflect changing seasons
Adapting your home decor to reflect the changing seasons is a delightful way to keep your living space fresh and in harmony with the world outside. This practice not only refreshes your home’s aesthetic but also helps you connect with the natural rhythm of the year. Let’s explore how to seamlessly transition your decor through each season.
Seasonal Decor Transition Guide
| Season | Color Palette | Key Elements | Textures | Scents |
|---|---|---|---|---|
| Spring | Pastels, Light Greens | Fresh Flowers, Easter Decor | Light Fabrics, Wicker | Floral, Fresh Linen |
| Summer | Bright Blues, Yellows | Seashells, Beach Themes | Cotton, Linen | Citrus, Ocean Breeze |
| Autumn | Deep Oranges, Browns | Pumpkins, Leaves | Wool, Knits | Cinnamon, Apple Pie |
| Winter | Whites, Deep Reds | Evergreens, Snowflakes | Velvet, Faux Fur | Pine, Vanilla |
To effectively adapt your decor throughout the year:
Establish a neutral base: Keep your walls and major furniture pieces in neutral tones. This creates a versatile canvas for seasonal accents.
Invest in versatile decor pieces: Choose items that can transition between seasons with minor adjustments, such as:
- Glass vases that can hold spring flowers or autumn leaves
- Throw pillows with removable covers for easy seasonal swaps
- Neutral-toned picture frames that complement any seasonal art
Create a seasonal storage system: Organize your decor items by season for easy access when it’s time to switch things up.
Gradually transition between seasons: Begin introducing elements of the upcoming season while still maintaining some aspects of the current one. This creates a smooth and natural transition.
Use nature as inspiration: Look to the outdoors for cues on color schemes and natural elements to incorporate into your decor.
Seasonal Decor Ideas
Spring:
- Replace heavy winter curtains with sheer, light-colored fabrics
- Introduce potted plants and fresh flower arrangements
- Display Easter-themed decor like pastel-colored eggs or bunny figurines
- Swap out dark throw pillows for ones with floral or pastel patterns
Summer:
- Bring in bright, bold colors through accent pieces like throw pillows or artwork
- Display seashells, driftwood, or other beach-inspired elements
- Use lightweight fabrics for curtains and bedding
- Incorporate tropical plants or bright floral arrangements
Autumn:
- Introduce warm, rich colors through throw blankets and pillows
- Display pumpkins, gourds, and autumn leaves in decorative bowls or vases
- Hang a fall-themed wreath on the front door
- Switch to heavier, textured fabrics like wool or flannel
Winter:
- Bring out cozy, plush textures like faux fur throws and velvet pillows
- Display evergreen garlands, pinecones, and winter berries
- Hang string lights or use candles for a warm, inviting glow
- Incorporate metallic accents in gold or silver for a festive touch
By adapting your decor to reflect the changing seasons, you create a dynamic living space that always feels fresh and in tune with the world around you. This approach not only keeps your home visually interesting but also helps you fully embrace and enjoy each season as it comes.
C. Use nostalgic elements to create comforting environments
Incorporating nostalgic elements into your home decor is a powerful way to create a comforting environment that evokes fond memories and a sense of warmth. This approach aligns perfectly with the “grandmacore” aesthetic we discussed earlier and can be adapted to suit any season. Let’s explore how to infuse your space with nostalgic charm throughout the year.
Year-Round Nostalgic Decor Ideas
Display family heirlooms:
- Showcase vintage photographs in antique frames
- Use inherited china or silverware for special occasions
- Display old family recipes in the kitchen
Incorporate vintage furniture pieces:
- Add a retro armchair or rocking chair to your living room
- Use an antique dresser as a unique TV stand
- Place a vintage vanity in your bedroom for a touch of old-world glamour
Use classic patterns and textures:
- Hang wallpaper with vintage-inspired prints in a powder room or as an accent wall
- Layer crocheted doilies on side tables or dressers
- Display quilts or needlepoint pillows on sofas and beds
Create cozy reading nooks:
- Set up a comfortable chair near a window
- Add a vintage floor lamp for soft, warm lighting
- Place a small bookshelf filled with classic novels nearby
Incorporate retro-inspired appliances and decor:
- Use a vintage-style radio or record player as a decorative piece
- Display old-fashioned clocks or timepieces
- Add a retro-inspired refrigerator or stove to your kitchen
Seasonal Nostalgic Elements
Spring:
- Display vintage seed packets or gardening tools
- Use antique vases for fresh flower arrangements
- Hang traditional Easter decorations like hand-painted eggs
Summer:
- Set up a lemonade stand using vintage pitchers and glasses
- Display old-fashioned beach toys or postcards
- Use retro-inspired picnic baskets for outdoor gatherings
Autumn:
- Showcase vintage apple picking baskets filled with gourds
- Display old school books or supplies
- Use traditional harvest-themed decor like corn husks and wheat sheaves
Winter:
- Hang vintage Christmas ornaments or stockings
- Display old-fashioned snow globes or nutcrackers
- Use traditional advent calendars or candle holders
Creating a Nostalgic Atmosphere
To truly capture the essence of nostalgia in your home, consider appealing to all the senses:
Visual: Use soft, warm lighting to create a cozy atmosphere. Opt for table lamps, floor lamps, or even oil lamps for an authentic vintage feel.
Auditory: Play music from bygone eras on a record player or vintage-style radio. The crackling sound of vinyl can add to the nostalgic ambiance.
Olfactory: Use scents that evoke childhood memories:
- Bake cookies or bread for a homey aroma
- Use lavender sachets in drawers and closets
- Light candles with classic scents like vanilla or cinnamon
Tactile: Incorporate a variety of textures that invite touch:
- Soft, worn leather
- Smooth, polished wood
- Rough, handwoven textiles
Taste: Keep a bowl of classic candies or treats that remind you of childhood visits to grandparents or special occasions.
Nostalgic DIY Projects
Engage in some nostalgic DIY projects to add personal touches to your decor:
Create a memory shadowbox:
- Gather small mementos, tickets, or photographs
- Arrange them artfully in a shallow shadowbox frame
- Display in a prominent place as a conversation piece
Make a vintage photo wall:
- Collect old family photos or vintage images
- Use a mix of frame styles for an eclectic look
- Arrange in a gallery wall format
Upcycle vintage suitcases:
- Clean and restore old suitcases
- Stack them to create a unique side table
- Use them for storage of seasonal decor items
Craft a nostalgic scent diffuser:
- Fill a vintage glass bottle with essential oils
- Add reed diffuser sticks
- Place in bathrooms or bedrooms for a subtle, classic fragrance
Create a memory jar:
- Use a large, vintage mason jar
- Encourage family members to write down happy memories on slips of paper
- Fill the jar throughout the year and read them together on New Year’s Eve
By incorporating these nostalgic elements and ideas into your home decor, you can create a comforting environment that not only looks beautiful but also feels deeply personal and emotionally resonant. This approach to decorating helps to create a home that tells your family’s story and celebrates your shared history, all while keeping your space fresh and adaptable to the changing seasons.
As we’ve explored the ways to embrace seasonal decor for year-round charm, we’ve seen how incorporating “grandmacore” elements, adapting decor to reflect changing seasons, and using nostalgic elements can create a warm and inviting atmosphere in your home. These strategies allow you to continually refresh your living space while maintaining a sense of comfort and familiarity.
With this foundation of seasonal and nostalgic decor in place, we’re now ready to explore how to make strategic updates for maximum impact. In the next section, we’ll delve into targeted improvements that can dramatically transform your living space, building on the cozy and personalized atmosphere we’ve created through seasonal decor.
Make Strategic Updates for Maximum Impact
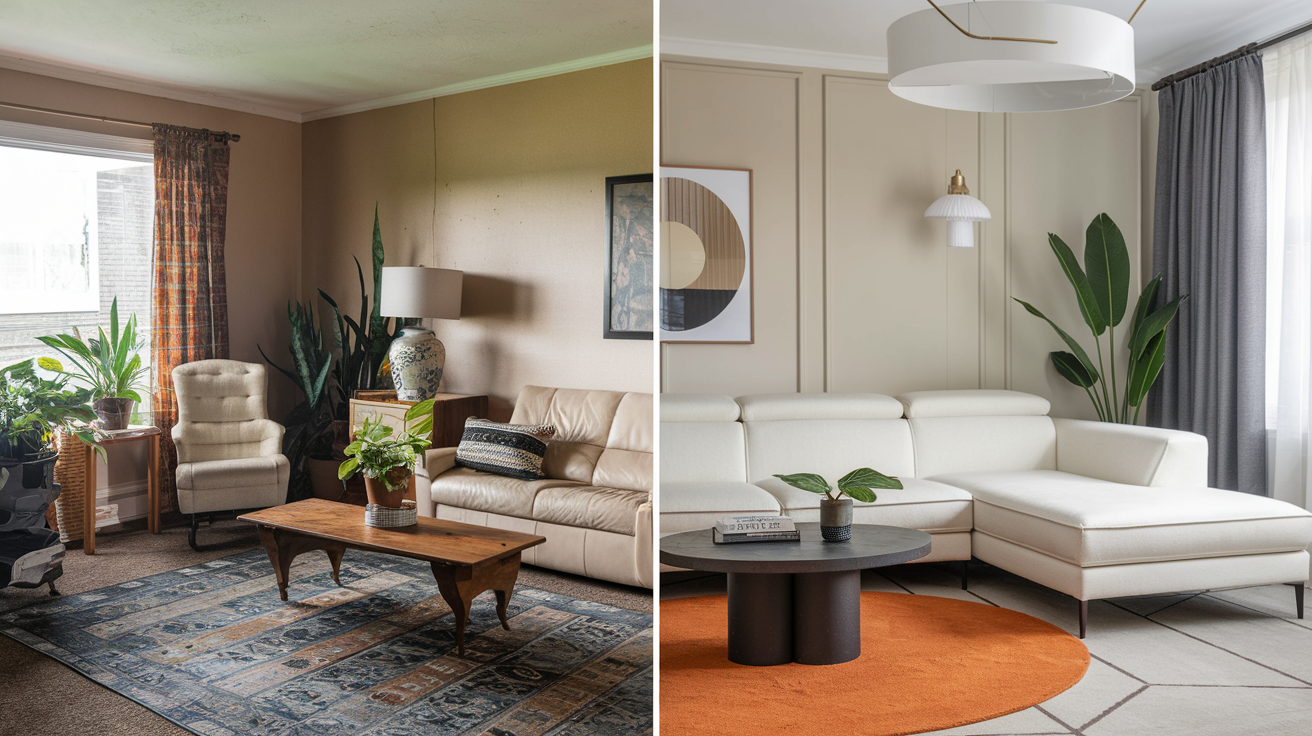
Now that we’ve explored how to embrace seasonal decor for year-round charm, let’s dive into strategic updates that can maximize the impact of your home transformation. My Home Twitza offers innovative solutions to refresh your living space with minimal effort and maximum effect.
A. Replace mirrors to refresh bathroom aesthetics
Updating your bathroom’s mirrors is a simple yet powerful way to transform the entire look of the space. My Home Twitza recognizes that mirrors play a crucial role in both functionality and aesthetics. Here’s how you can make the most of this strategic update:
Choose statement frames: Opt for mirrors with bold, decorative frames that complement your bathroom’s style. A well-chosen frame can serve as a focal point and elevate the entire room’s design.
Experiment with shapes: Move beyond traditional rectangular mirrors and explore unique shapes like round, oval, or even asymmetrical designs. These unconventional shapes can add visual interest and create a modern, fresh look.
Install multiple mirrors: Consider replacing a single large mirror with a collection of smaller mirrors. This approach can create a sense of spaciousness and allow for more creative arrangements.
Incorporate lighting: Select mirrors with built-in LED lighting or add separate lighting fixtures around your mirror. Proper illumination can enhance the functionality of your bathroom while creating a luxurious ambiance.
Opt for smart mirrors: Embrace technology by installing smart mirrors that offer features like anti-fog capabilities, built-in clocks, or even touchscreen displays for a truly modern bathroom experience.
Benefits of updating bathroom mirrors:
| Benefit | Description |
|---|---|
| Enhanced lighting | Properly placed mirrors can reflect natural and artificial light, brightening up the space |
| Illusion of space | Strategic mirror placement can make small bathrooms appear larger and more open |
| Style refresh | A new mirror can instantly update the look of your bathroom without the need for extensive renovations |
| Improved functionality | Larger or multiple mirrors can make daily grooming routines more convenient for multiple users |
| Increased home value | Updated fixtures, including stylish mirrors, can contribute to a higher perceived value of your home |
By replacing your bathroom mirrors, you’re not just updating a single element; you’re transforming the entire feel of the space. My Home Twitza emphasizes that this simple change can have a ripple effect, inspiring further updates and improvements throughout your bathroom and beyond.
B. Update lampshades for an instant room makeover
Lighting plays a crucial role in setting the mood and ambiance of any room. My Home Twitza recognizes that updating lampshades is a quick and cost-effective way to refresh your living space. Here’s how you can leverage this strategic update:
Experiment with textures: Choose lampshades with interesting textures like linen, silk, or even woven materials to add depth and visual interest to your room.
Play with colors: Select lampshades in bold hues or patterns that complement your existing decor. A pop of color can instantly liven up a neutral space.
Mix and match styles: Don’t be afraid to combine different lampshade styles within the same room. This eclectic approach can create a unique and personalized look.
Consider size and proportion: Ensure that the new lampshades are proportionate to the base of your lamps and the overall scale of your room. A well-sized lampshade can dramatically improve the aesthetic balance of your space.
Explore shapes: Move beyond traditional drum shades and experiment with unique shapes like empire, bell, or even geometric designs to add visual intrigue.
DIY customization: Get creative by customizing plain lampshades with fabric, paint, or trim. This personal touch can make your lamps truly one-of-a-kind.
Layer lighting: Use a combination of table lamps, floor lamps, and overhead lighting with varied lampshades to create a multi-dimensional lighting scheme.
Impact of updated lampshades on room ambiance:
| Aspect | Before | After |
|---|---|---|
| Light quality | Harsh or dim lighting | Soft, diffused illumination |
| Color temperature | Inconsistent or unflattering | Warm and inviting |
| Style cohesion | Outdated or mismatched | Harmonious with overall decor |
| Visual interest | Plain or unremarkable | Eye-catching and conversation-starting |
| Mood | Static or uninspiring | Dynamic and adaptable to different settings |
My Home Twitza emphasizes that updating lampshades is not just about changing the look of your lamps; it’s about transforming the entire atmosphere of your room. The right lampshade can diffuse light in a way that flatters your space and creates a cozy, welcoming environment.
Consider these additional tips for maximizing the impact of your lampshade update:
- Seasonal rotation: Keep a selection of lampshades that you can switch out seasonally to refresh your space throughout the year.
- Layered textures: Combine different materials in your lampshades to add depth and interest. For example, a sheer outer layer over a more opaque inner shade can create a beautiful, soft glow.
- Smart bulbs: Pair your new lampshades with smart LED bulbs that allow you to adjust color temperature and brightness, further enhancing the versatility of your lighting.
- Statement pieces: Use oversized or uniquely shaped lampshades as statement pieces in your room, drawing the eye and serving as focal points in your decor.
- Coordinated sets: For a cohesive look, update lampshades across multiple rooms using complementary styles or color palettes.
By strategically updating your lampshades, you’re not just changing a small detail; you’re reimagining the entire lighting scheme of your home. This simple yet effective update can breathe new life into your living spaces, creating a fresh and inviting atmosphere that reflects your personal style.
C. Use drapery to soften entrances and create visual interest
Drapery is a powerful tool in the My Home Twitza arsenal for transforming living spaces. By focusing on entrances and key areas, you can use drapery to soften transitions between rooms and add a layer of sophistication to your home. Here’s how to make the most of this strategic update:
Frame doorways: Install drapery panels on either side of doorways to create a grand entrance effect. This technique can make standard doorways appear larger and more inviting.
Create room dividers: Use ceiling-mounted curtain tracks to install drapery that can act as flexible room dividers. This allows you to adapt open-plan spaces for different uses or create more intimate areas when needed.
Soften archways: Hang sheer curtains in archways to add a romantic, flowing element to your home’s architecture. This can blur the lines between spaces and create a sense of continuity.
Enhance windows: Don’t limit drapery to just covering windows. Use it to frame and enhance your views, choosing fabrics and styles that complement both the interior and the outdoor scenery.
Layer textures: Combine different fabric weights and textures in your drapery to add depth and interest. For example, pair sheer panels with heavier, textured curtains for a luxurious look.
Play with patterns: Introduce patterned drapery to add visual interest to neutral spaces. Bold patterns can serve as artwork, becoming a focal point in the room.
Utilize color psychology: Choose drapery colors that evoke the desired mood in each space. Soft, cool tones can create a calm atmosphere, while vibrant hues can energize a room.
Benefits of strategic drapery use:
| Benefit | Description |
|---|---|
| Improved acoustics | Fabric helps absorb sound, reducing echo and creating a more comfortable environment |
| Temperature control | Drapery can help insulate rooms, keeping them cooler in summer and warmer in winter |
| Privacy enhancement | Adjustable drapery allows for flexible privacy control without sacrificing natural light |
| Architectural interest | Well-placed drapery can highlight or soften architectural features of your home |
| Versatile decor | Easily changeable drapery allows for quick seasonal updates or style refreshes |
My Home Twitza emphasizes that drapery is not just for windows; it’s a versatile design element that can transform the entire feel of your home. Here are some innovative ways to use drapery for maximum impact:
Canopy effect: Create a cozy, intimate atmosphere in bedrooms by installing a ceiling-mounted drapery canopy above the bed.
Outdoor spaces: Extend your living area by using weather-resistant drapery to define and soften outdoor spaces like patios or balconies.
Closet concealment: Use drapery to conceal open closets or storage areas, adding a soft, elegant touch to functional spaces.
Headboard alternative: Hang a floor-to-ceiling drape behind your bed as a dramatic alternative to a traditional headboard.
Staircase enhancement: Soften the lines of a staircase by draping fabric along the banister or creating a fabric wall alongside the stairs.
Home office privacy: Install drapery to section off a home office area in a multi-use room, providing privacy and visual separation when needed.
Art display: Use drapery as a backdrop for displaying artwork or photographs, creating a gallery-like feel in your home.
Ceiling treatment: Hang lightweight fabric from the ceiling to create a tented effect, adding drama and softening harsh lines in modern spaces.
Entryway statement: Create a dramatic first impression by using drapery to frame your home’s main entrance, both inside and out.
Media room ambiance: Install thick, light-blocking drapery in media rooms to improve acoustics and create a cinema-like atmosphere.
When selecting drapery for these applications, consider the following factors:
Fabric weight: Choose fabrics appropriate for their intended use. Heavier fabrics work well for room dividers and privacy, while lighter fabrics are ideal for softening spaces and allowing light filtration.
Maintenance: Opt for easy-care fabrics in high-traffic areas or homes with children and pets. Look for machine-washable options or consider professional cleaning services for more delicate materials.
Hardware: Invest in quality curtain rods, tracks, and tiebacks. These elements can enhance the overall look and functionality of your drapery.
Length: Experiment with different lengths to achieve various effects. Floor-to-ceiling drapes can make rooms appear taller, while shorter lengths can create a more casual, relaxed atmosphere.
Lining: Consider lined drapery for better insulation, light control, and a more luxurious appearance.
Motorization: For frequently used drapery or hard-to-reach areas, consider motorized options for convenience and a touch of modern luxury.
My Home Twitza suggests incorporating these drapery ideas gradually, starting with key areas of your home where you want to make the most impact. As you become more comfortable with using drapery as a design element, you can expand its application throughout your living spaces.
Remember that drapery is not just about function; it’s about creating mood, enhancing architecture, and adding a layer of sophistication to your home. By strategically using drapery to soften entrances and create visual interest, you’re not just decorating; you’re crafting experiences and atmospheres within your living space.
To further maximize the impact of your drapery updates, consider these advanced techniques:
Ombré effect: Create a custom ombré look by dyeing plain curtains in graduated shades. This can add a modern, artistic touch to any room.
Seasonal rotation: Maintain a selection of drapery options that you can switch out seasonally. Lighter fabrics and colors for spring and summer, and richer, heavier options for fall and winter.
Layered look: Combine different types of drapery on the same window or entrance. For example, pair sheer curtains with heavier side panels for a luxurious, layered effect.
Trim and embellishments: Add personality to plain curtains with decorative trim, tassels, or embroidery. This allows you to customize your drapery to perfectly match your decor.
Repurposed fabrics: Get creative by using unconventional materials as drapery. Vintage scarves, tapestries, or even repurposed clothing can create unique, conversation-starting window treatments.
Color blocking: Use drapery to introduce bold color blocking in your space. This can be particularly effective in minimalist or neutral rooms.
Texture play: Mix and match textures within your drapery scheme. Combine smooth silks with nubby linens or plush velvets for a rich, tactile experience.
Geometric patterns: Use drapery with bold geometric patterns to add a modern edge to traditional spaces or to complement contemporary interiors.
Nature-inspired designs: Incorporate drapery with nature-inspired patterns or scenes to bring a sense of the outdoors inside, particularly effective in urban environments.
Metallic accents: Choose drapery with subtle metallic threads or pair fabric with metallic hardware for a touch of glamour and light reflection.
By implementing these strategic updates – replacing mirrors, updating lampshades, and using drapery creatively – My Home Twitza empowers you to transform your living space with maximum impact. These changes may seem simple, but their effects can be profound, altering the entire feel and functionality of your home.
As you embark on these updates, remember that the key is to approach each change with intention and creativity. Consider how each element interacts with the others and how they contribute to the overall atmosphere you want to create. With My Home Twitza’s guidance, you can turn your house into a home that truly reflects your personal style and meets your evolving needs.
The beauty of these strategic updates lies in their flexibility and scalability. You can start small, perhaps with a single room or even a corner, and gradually expand your efforts as you see the positive changes unfold. This approach allows you to refine your style, experiment with different techniques, and discover what works best for your unique space and lifestyle.
Moreover, these updates offer an excellent opportunity to embrace sustainability in your home decor choices. Consider eco-friendly materials for your new mirrors, energy-efficient lighting options for your updated lamps, and sustainably sourced fabrics for your drapery. This not only contributes to a healthier planet but also creates a more conscious and meaningful living environment.
As you implement these changes, don’t be afraid to mix traditional elements with modern touches. This eclectic approach can result in a rich, layered interior that feels both timeless and fresh. For instance, pair a vintage mirror with contemporary lighting, or combine classic drapery styles with bold, modern patterns.
Remember that lighting plays a crucial role in how we perceive spaces. As you update your mirrors and lampshades, pay attention to how light is distributed throughout your rooms. Experiment with different bulb types, color temperatures, and intensities to create the perfect ambiance for each area of your home.
When it comes to drapery, consider its acoustic properties as well. Strategically placed fabric can help absorb sound, creating a more peaceful and comfortable living environment. This is particularly beneficial in open-plan spaces or homes with hard flooring surfaces.
Lastly, don’t underestimate the power of these updates to affect your mood and well-being. A well-lit, beautifully draped space with thoughtfully placed mirrors can make your home feel more spacious, welcoming, and uplifting. These changes can transform not just your living space, but also your daily experiences within it.
By focusing on these strategic updates, My Home Twitza helps you create a home that is not only visually appealing but also functionally superior and emotionally satisfying. Each mirror, lampshade, and drapery becomes a part of a larger narrative – the story of your home and how it supports and enhances your life.
As you continue your home transformation journey, remember that the process is just as important as the result. Enjoy the creativity, the problem-solving, and the sense of accomplishment that comes with each update. Your home is a reflection of you, and these strategic changes allow you to express your personality and adapt your space to your evolving needs and tastes.
With My Home Twitza’s guidance, you’re not just updating your home; you’re creating a living space that truly works for you, enhances your daily life, and brings joy to everyone who enters. These strategic updates are more than just decorative changes – they’re investments in your comfort, your style, and your overall well-being.

“My Home Twitza” offers an array of transformative solutions for every corner of your home. From bold kitchen designs to strategic updates that maximize impact, these ten shocking ways demonstrate how small changes can yield significant results. By embracing color, experimenting with patterns, and creating functional nooks, you can breathe new life into your living space without breaking the bank.
Remember, the key to a successful home transformation lies in thoughtful planning and creativity. Whether you’re tackling DIY projects or incorporating seasonal decor, each change contributes to a more personalized and inviting atmosphere. So why wait? Start your home makeover journey today and discover how “My Home Twitza” can help you fall in love with your living space all over again.


